Hardy bulbs are planted in the fall and will come up in the spring. The reason they are called hardy is that they can survive and actually need a period of cold in order to bloom in the spring or summer. Given a period of 2-4 months of chilling, (perhaps in the refrigerator?!?) many of these bulbs can be forced into blooming early for a nice break in the dark of winter.
Examples of Hardy Bulbs: Tulips, Narcissus & Daffodils, Lilium, Allium, Leucojum, Galanthus, Arisaema, Mertensia, Dicentra, Crocus, Iris, Colchicum, Erythronium, Fritillaria, Hemerocallis, Hyacinthoides, Muscari, Ornithogalum, Scilla, Anemone blanda
Tender bulbs are planted in the spring for summer blooming. They cannot withstand the winter and must be dug up and stored in a cool dry place. They’re not as easy to force. These bulbs respond more to daylight and to warmth to start their growth cycle. To give them a headstart I usually start my spring and summer bulbs indoors in the late winter so by the spring the plants will be more substantial in size.
Examples of Tender Bulbs: Amaryllis, Dahlias, Begonias, Colocasia, Alocasia, Canna, Ipomoea, Gladiolus, Hedychium
Interested in having these flowers all year long? Visit my online Art Shop and select from an assortment of flowers and gardens.
These double daffodils bloom in mid-spring in my garden. It wasn’t until I began to create this Artwork did I realize that these particular flowers are quite fragrant unlike many of the spring blooming varieties. This made for a nice addition to my enjoyment of creation!


 Daffodils are classified using two parts of the flower. For the purpose of this description, the daffodil is divided into two regions, the perianth (petals) and corona (cup).
 Division 1 – Trumpet
 Division 2 – Large Cup
 Division 3 – Short Cup
 Division 4 – Double
 Division 5 – Triandrus
 Division 6 – Cyclamineus
 Division 7 – Jonquilla
 Division 8 – Tazetta
 Division 9 – Poeticus
 Division 10 – Bulbocodium Hybrids
 Division 11 – Split Corona
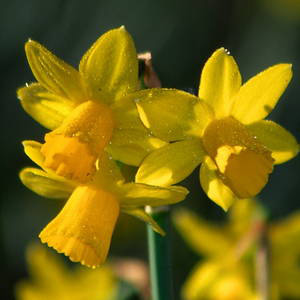 Division 12 – Other Cultivars
 Division 13 – Species All species and reputedly wild forms.


