Your Body Is Like Your Garden: Pay Attention to Signs of Distress
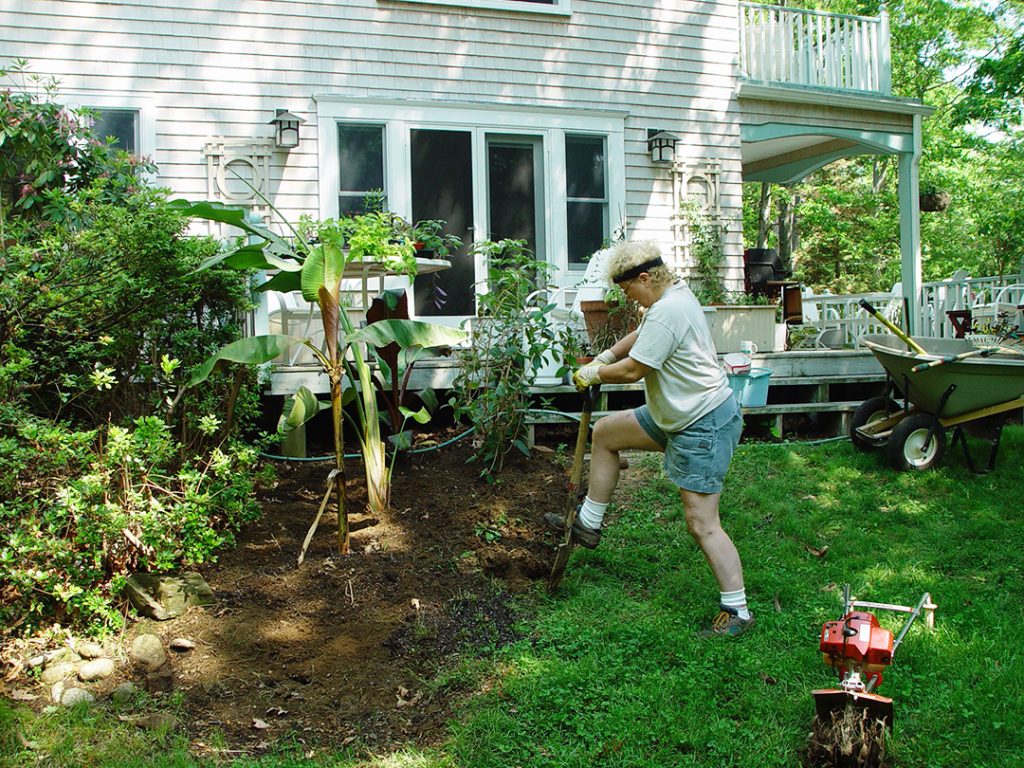
Here’s me planting my original tropical summer garden. Definitely overdoing it in the heat. (May 2002)
I overdid it again. One day this week, I spent five straight hours in my garden on a steaming, humid 90-degree day. My clothes were drenched and clinging, even my sweatband was dripping. I was getting wobbly, in danger of toppling over and suffering broken bones or worse. And then, a mild evening breeze swept by me, gently cooling my skin. At that moment, I snapped to my senses and realized I was flirting at the edge of disaster. So I stopped. Abruptly. I left the wheelbarrow filled with mulch, ready to be shoveled into the flower beds. I left it right where it was in the middle of the walkway. It was so heavy, and I was too tired to push and too tired to shovel. The reality of being 77 years old smacked me hard, and I shuddered at the consequences I was dancing with.
Throughout the day, I had filled my favorite 24-ounce, pink water bottle multiple times. I had eaten my usual meal of fresh fruit, coconut yogurt, gluten-free granola, topped off with some raw almonds. I am careful about myself. I eat well and hydrate well. I take care of myself. But maybe, just maybe, I should have paid attention earlier. Maybe this time I just got lucky. Perhaps I should have stopped working sooner in that suffocating hot and humid heat. And maybe I needed to pay attention to how I was feeling earlier, before I became wobbly. I had ignored the warnings my body was sending me throughout the day. Again.
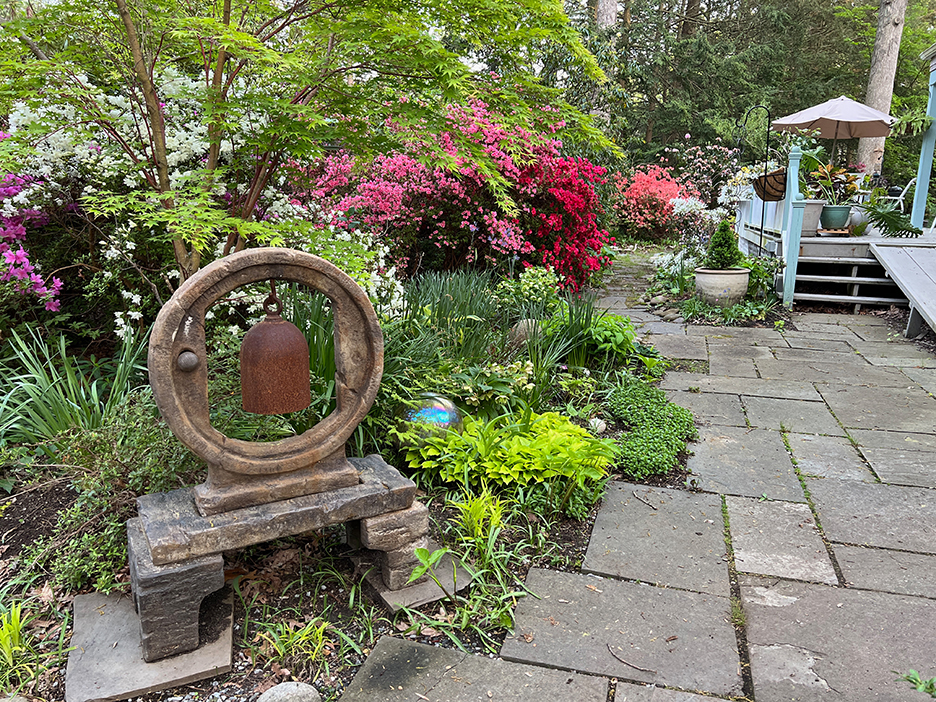
Entrance to my garden. May, 2025
For over 35 years, this garden has been a solitary endeavor, where I continually design and redesign the landscape and plantings. I have worked independently, savoring the time to think quietly by myself, my sanctuary where I find my center. But I began to recognize that many heavier tasks like mulching, planting, and transplanting were no longer getting done. My garden was suffering. And so was my aching body.
For the last year, though, I’ve been lucky to have a garden helper for a few hours once a week to help with chores that have now become too difficult for me. It had been hard for me to invite someone to work in my garden. But when the option of working with John, a man experienced in yard work arrived, I grabbed it. Now, from March through October, once a week, he joins me in the garden.
John’s approach to self-care became clear to me the other day, when he had left for home after working in my garden for only two out of his usual five hours. Leaving early was totally unusual for him. It had been another hot, humid day, and not enough water was cooling his system. I was concerned about him.
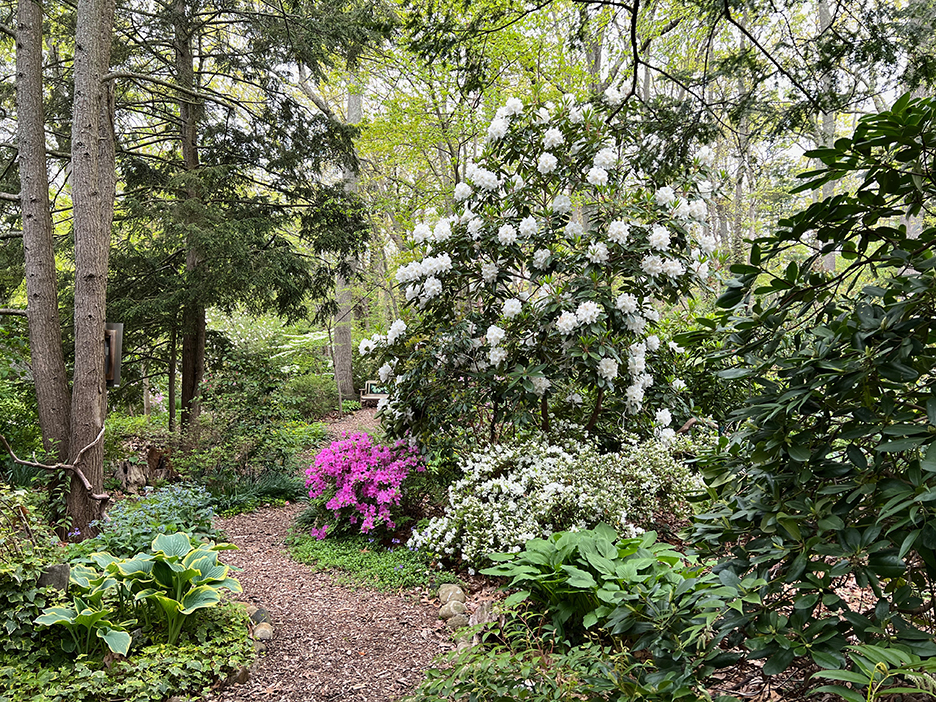
Woodland Garden. May 2025.
John returned the next day feeling refreshed and healthy again after going home, taking two showers, separated by two naps and dinner before sleeping through the night. He emphasized the importance he is aware of in taking responsibility of himself. He said he knew what he needed to do to keep himself safe and healthy since he wants to continue doing the physical work he loves. He took responsibility for his health. I admire that.
I try to stay aware of my needs, but there are times when I need a reminder —a soft evening breeze to wake me. Just a gentle nudge to remind me to pay attention to what is happening in and around my life at that moment.
Like a collapsing hydrangea in the summer sun, I too need water, cooling shade, and careful attention to the messages my body and brain are sending to me in order to thrive. Perhaps, like John, taking responsibility for myself with well-considered decisions, sprinkled with a bit of luck, will be the key for me to continue my active lifestyle for a long time to come.
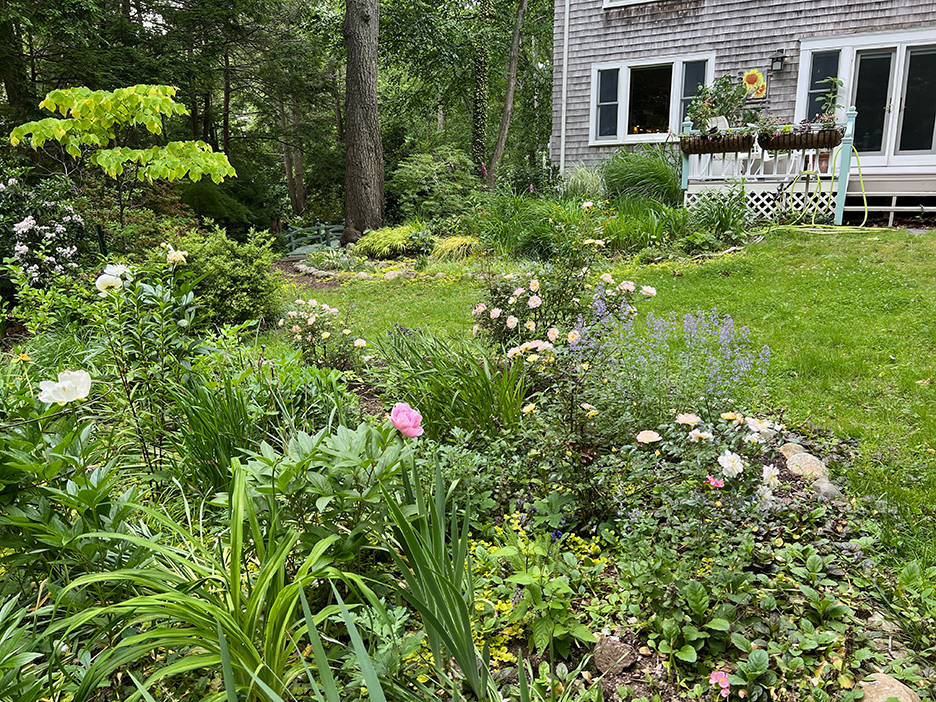
Front Garden in June

Rediscovering Currents
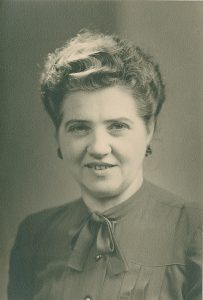
Wilhelmina Gerrits-Nicolai. AKA – Tante Wilh c.1947
When I was a young child growing up in Brooklyn NY, we would travel as a family to Holland to visit our relatives. As one would expect, I was always exposed to new ideas and experiences beyond the normal and predictable rhythm of my life. At home, I was used to what my mother cooked and how she cooked it though I was not included as an assistant in the kitchen. I was also not included in planning the meals, gathering the supplies, shopping for the food, or storing it. I didn’t clean it, chop it, or scrape it either. Basically, food was just put in front of me and I ate it. It was not something that I thought about.
Tante Wilh was our mother’s oldest sister and she lived with her husband Oom Herman in Breda. Wilhelmina was the eldest in that large Gerrits family and was so different than my mother Truus. She seemed so efficient and knowledgeable even though we didn’t speak the same languages fluently. We sure found ways to communicate.
At the age of seven, Tante Wilh had me working next to her in the kitchen, chopping vegetables, popping peas from pods, and taking the tips off the string beans. All her food was fresh, nothing canned like we had at my home. I don’t remember how those veggies tasted or whether I even liked them, what I do remember is how much I enjoyed being in the kitchen with her helping to make our meals.
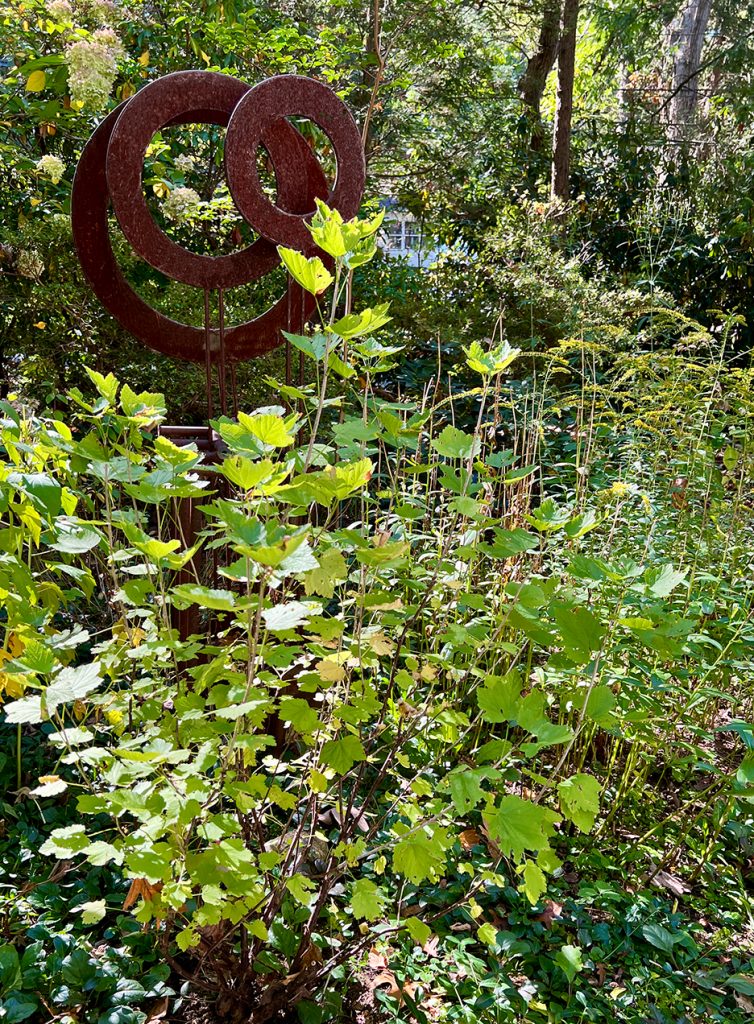
Current Shrub in my front garden (without the currents)
One day she handed me a fork and a bowl and sent me out to her garden and told me somehow or other with hand signals, my broken Dutch, and her broken English to get the red berries from the shrub growing along the edge of the garden. I found this big green shrub with these tiny bright red round berries. I used the fork as she had pantomimed, to slide the tines of the fork along the sides of the branch edge that was holding the berries. When I did so, the berries popped into the bowl she had given me. I felt so proud to be given such a great responsibility to harvest these home-grown red berries. I brought them into the kitchen and Tante Wilh had me wash them and then put them onto the salads we were having along with our dinner that evening. I was bursting with pride at having contributed so significantly to the meal the whole family was eating that evening at the dining room table together.
This year at one of the nurseries I frequent, I saw a bit of bright color dangling from the tips of the branches of a shrub. This color combination galvanized my interest. It turned out to be a Current shrub that was sporting the very same bright red berries that I’d seen all those years ago in Tante Wilh’s garden. Within moments that shrub ended up in the back of my SUV. Now, sitting with pride of place in the middle of the shrubs and perennials in my front garden is that Current bush. I can see it through the French Doors in my living room. The birds feasted on the berries before I could gather them. But that’s all right since I gather the memories which is more important than the taste of the berries to me. I can still feel the sense of belonging that Tante Wilh gave to me by sharing and teaching me about creating meals, about family, about inclusion, about process, and about growth, as I stood by her side, elbow to elbow in the kitchen.
Oh Dear, I Now Have Deer
I first noticed it in the fall. Something had eaten my hostas. My usual culprits have been the rabbits, but this was well beyond their usual food shopping spree. Perhaps they decided to invite their entire extended family this time. The raccoons ate all the minnows in my new small pond, so they weren’t hungry either. So I decided to install Ring cameras to see who was having a party in my garden while I innocently slept.
And there he was, a huge antlered deer. Oh Dear!
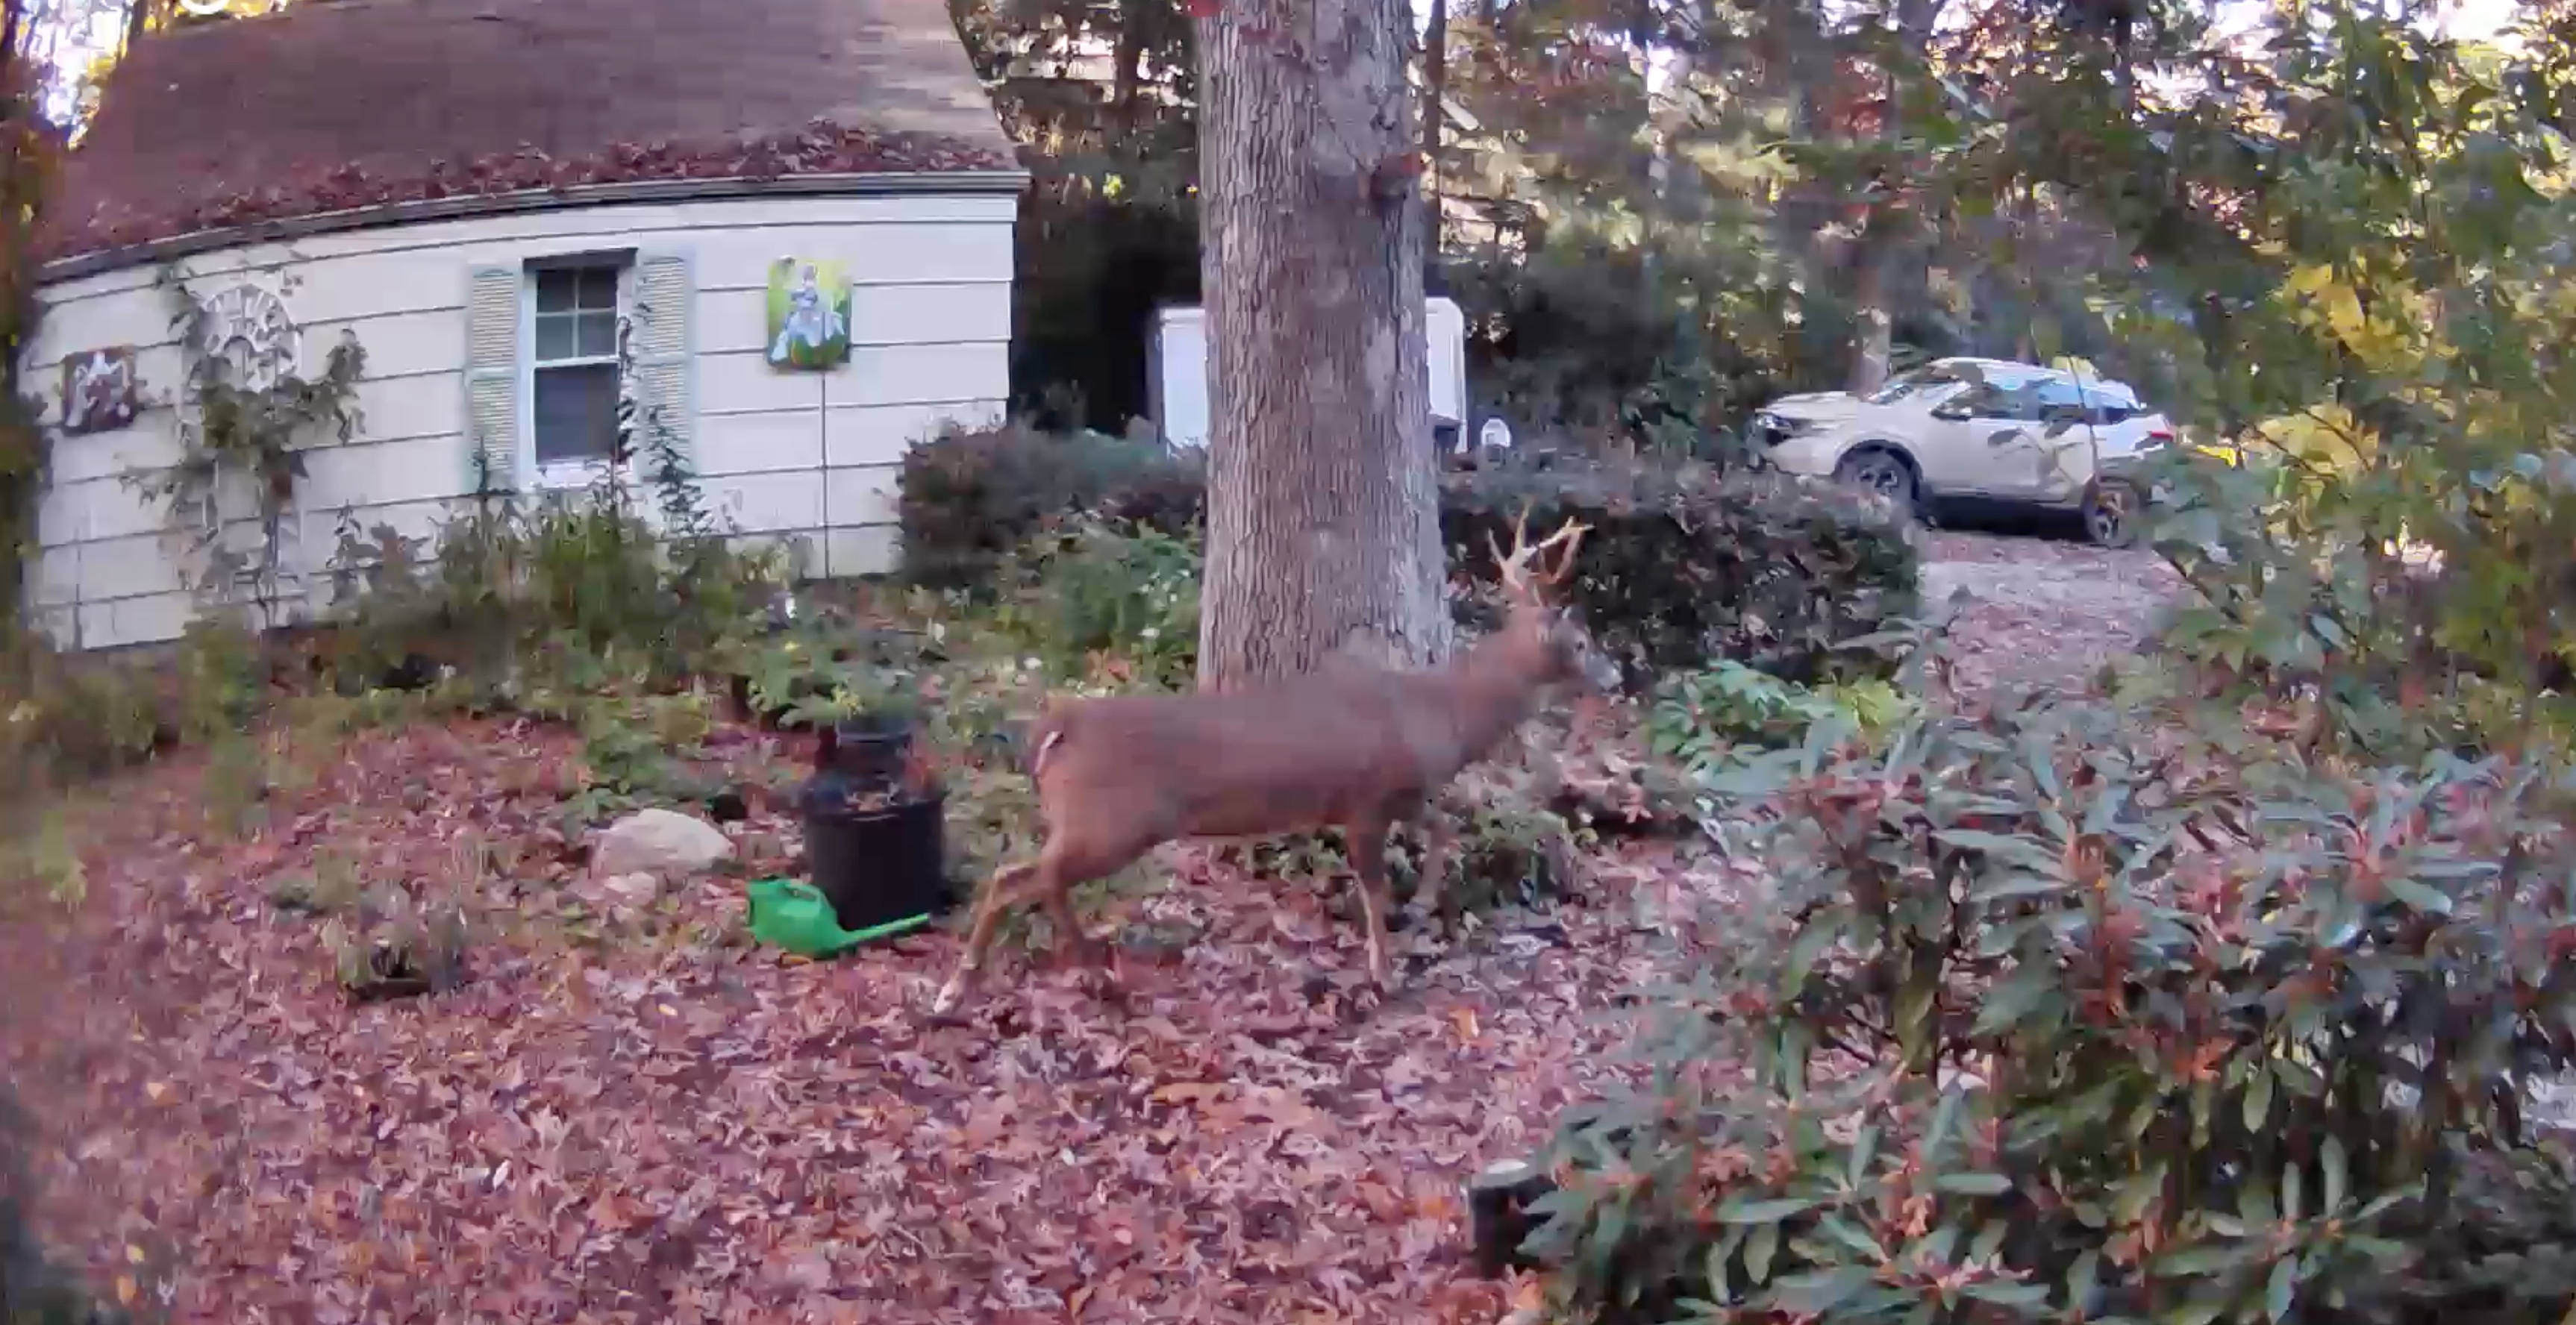
Daytime Deer in my Garden. I don’t know who was more scared, him or me.
The next day, I bought a battery-operated sprayer and researched what would work best to preserve my precious garden. Most of the products not only smelled bad enough to ward off the deer, but they also smelled bad enough to keep me out of the garden as well. I found one brand that also contained some mint, which apparently the deer hate, so that’s the one I settled on. So last fall, after every rainy day, I would head out to spray the perimeter of my garden. This year, I’m upping my game since the buck brought his harem and extended family.

In the front garden this deer ate all my hostas in one sitting. I was wondering if he was going to ask for some salad dressing.
I’m having deer fencing installed in the part of the garden where they most frequently gain entrance in the hopes of diverting their attention. This happened to be on the property line with my new neighbor. Using the markings he had in position from his recent surveying, together we agreed on the exact placement of my upcoming fence. I hung screaming yellow Caution tape to define the property line, which sure disturbs the calming woodland aesthetics I’ve been creating for the last 35 years. The next step was the installation of this one section of fencing, knowing full well that it was only the beginning of preserving my garden sanctuary.
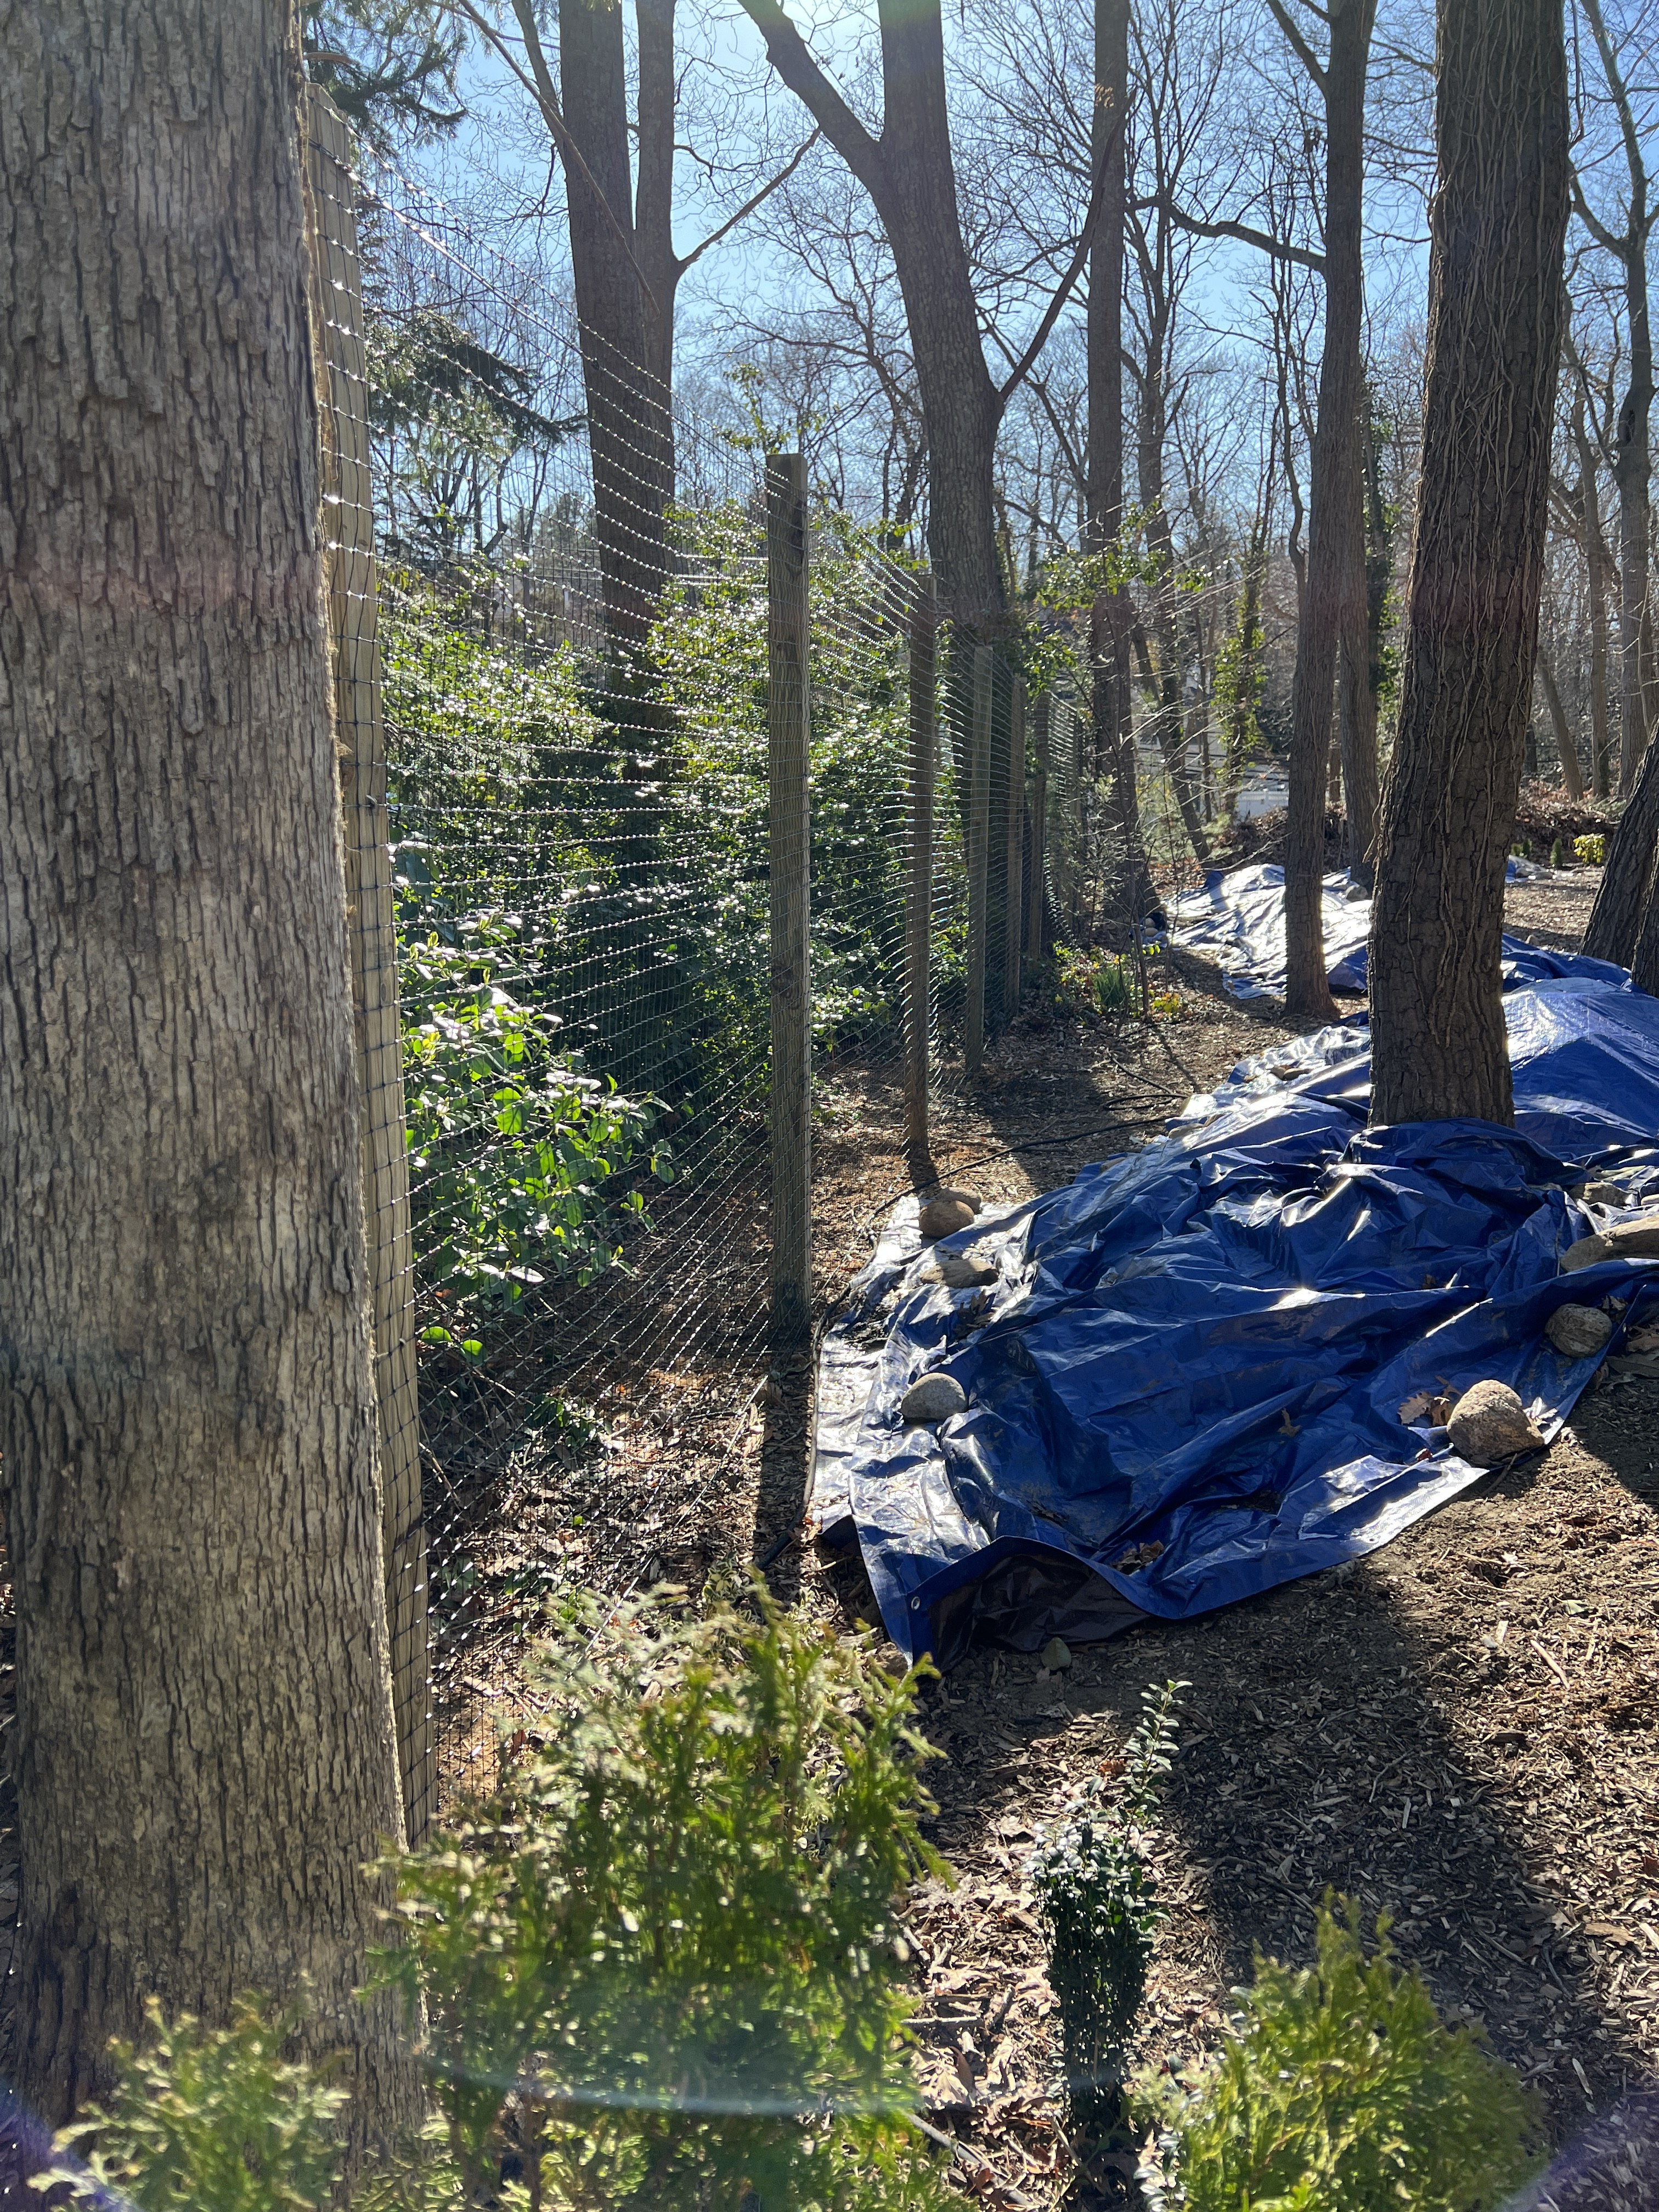
This is the view from my neighbor’s side of the deer fencing that I had installed on our mutual property line by Fence Solutions. I sure hope the deer notice it.
Hellebore Botany – Which Stage is Acceptable For Flower Show Judging
The question was posed as to why some Hellebore’s can be entered into Flower Show judging and others are rejected. Here’s the long answer.
Understanding the botany of the Hellebore will help explain the answer to the Flower Show suitability.
The attraction and colors of the Hellebore, Figure #1, are not supplied by petals but rather sepals. Petals are usually lost after a flower is fertilized but sepals and bracts don’t suffer the same fate and are persistent
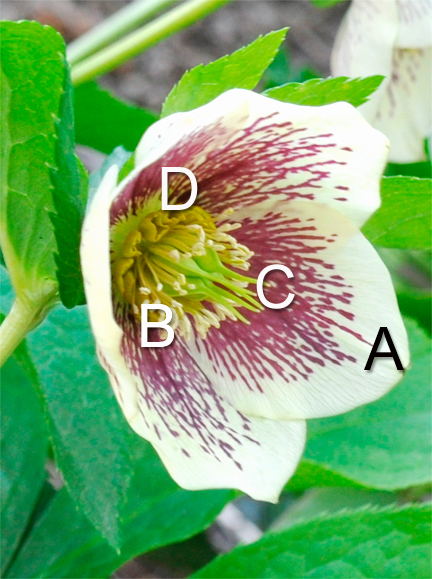
Fig. 1. Diagram of the botanical parts of a Hellebore flower. Photo courtesy of Monica Tehomolic.
Sepals (A) normally form outside of petals as a protection and support of the bud and flower. There are usually 5 sepals, two outer, two inner and one both. A group of sepals is called a calyx.
The stamens (B) are the male part of the flower and are made up of 2 parts, the long white filament and the anther that sits on top holding the pollen. There can be up to 150 stamens per flower.
The stamens surround the female part of the flower, the carpel (C). Fertilization of the carpels can be by insects, bees or wind.
Replacing the petal in the case of Hellebores are small nectaries (D) that sit at the base of the sepals and provide food for pollinators. They don’t last very long and are shed at the same time as the stamens when the carpels swell with what will become seeds.
Fertilized Hellebores can seem attractive for quite a long time since the sepals are persistent and the swollen carpels (E) are distinctive. The sepals will tend to loose their color vibrancy over time however.
Because the Hellebore in Figure #2 is a fertilized flower, even though the sepals still appear fresh, this is not the stage when it is an acceptable specimen in a formal Flower Show submission.
So, the short answer to the question of whether the Hellebore in Figure #2 is acceptable for Flower Show judging is: No, since the center is a fertilized seed pod.
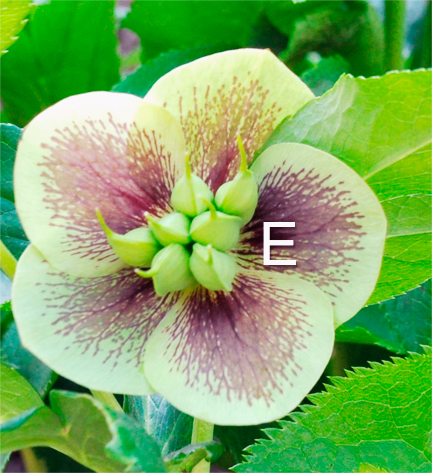
Fig. 2. Fertilized Hellebore. Photo courtesy of Monica Tehomolic
Trimming Hellebores. My First Gardening Task of the Spring
That first sunny warm day in February seduces me into my garden to begin my spring gardening tasks before the last snowstorms of winter reappear for a brief visit. It is a happy day for me each year when I reach for my Felco’s, put on my gardening gloves, pick up my rake and head out to reunite with my garden.
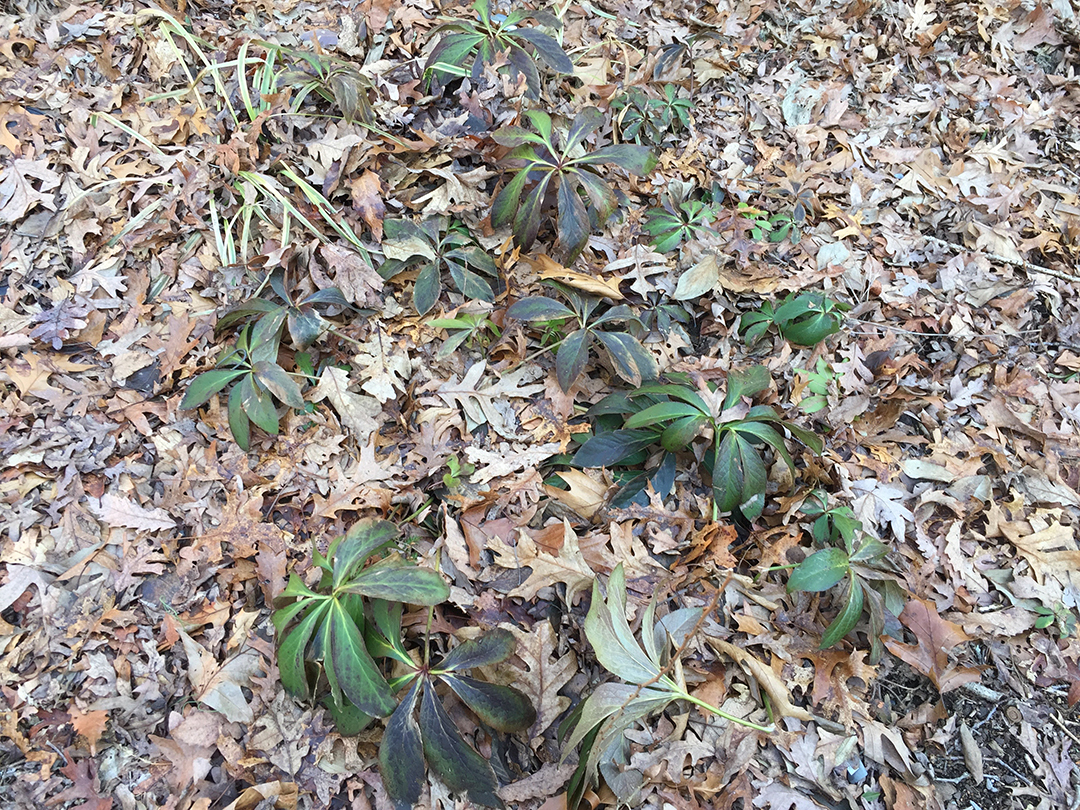
Hellebores remain evergreen and provide winter interest in my winter garden.
I always start by trimming the hellebores since the longer I wait the more complicated the job becomes. Those stalwart evergreen leaves that have decorated my garden all winter are by this time raggy, spotted, and brownish. Hiding beneath them are the brand new buds of the Hellebore flowers just waiting to burst through heralding spring. I love uncovering their light-deprived lime green growth and freeing them to bask in the sunshine.
Cutting the old leaves at this very early stage makes it less likely that I’ll damage the new growth. The old stems are long and thick at this time and easy to differentiate between the short almost stemless new growth. On the years that for one reason or another, I wasn’t quick enough to do this early trimming, the job took twice as long as I had to carefully select between the old and new growth leaves. Not easy to do without accidentally cutting off a few buds. Full disclosure: When I do cut or damage a plant in my garden I reflexively find myself apologizing to it out loud…sigh…
Not to worry about uncovering the hellebores when inevitably another bout of winter arrives since these are very hardy plants in my zone 6 garden. When the weather turns cold again for the next few weeks of winter I enjoy watching spring emerge through the windows in my home. Those hellebores burst through with so much optimism.
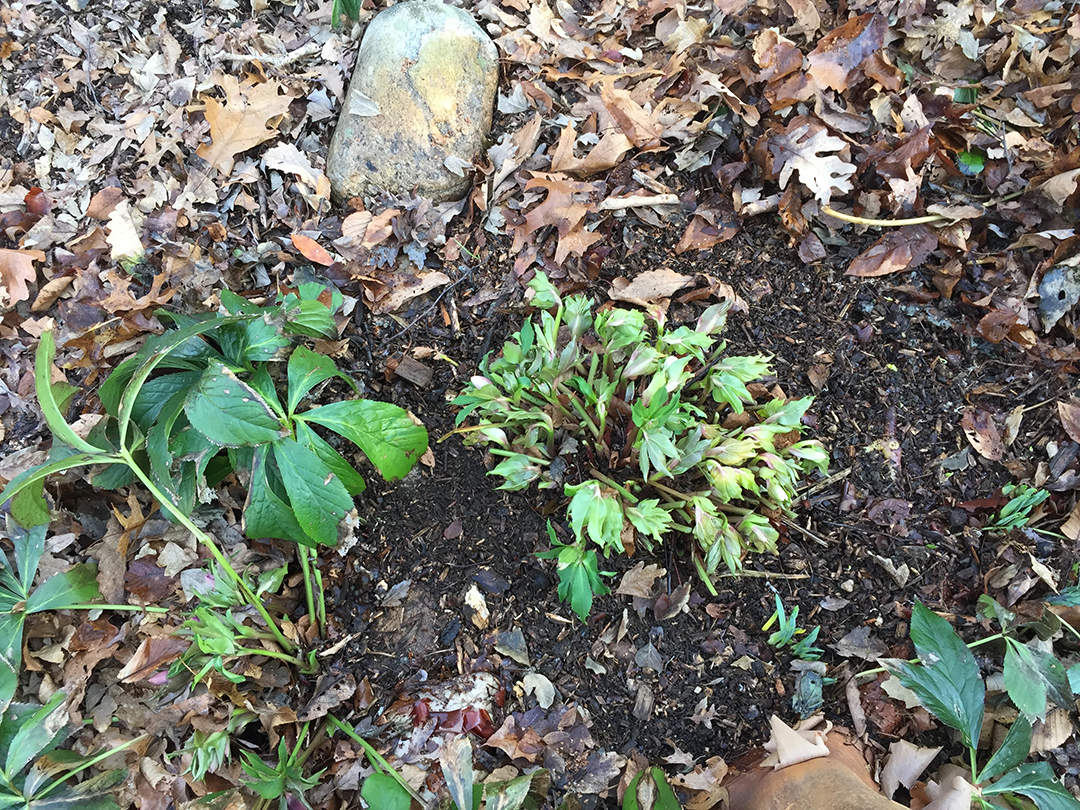
After trimming the old leaves, the emerging flowers of the Hellebore are a great glimpse of optimism for the upcoming spring season.
The Woodland Garden Reveals
My idea of the garden I wanted to create around my new home when I bought it in 1989, was a place to immerse myself, not a garden to be admired while sitting on the deck. I had no particular plan that I imagined. Instead, I let the woodland speak to me.
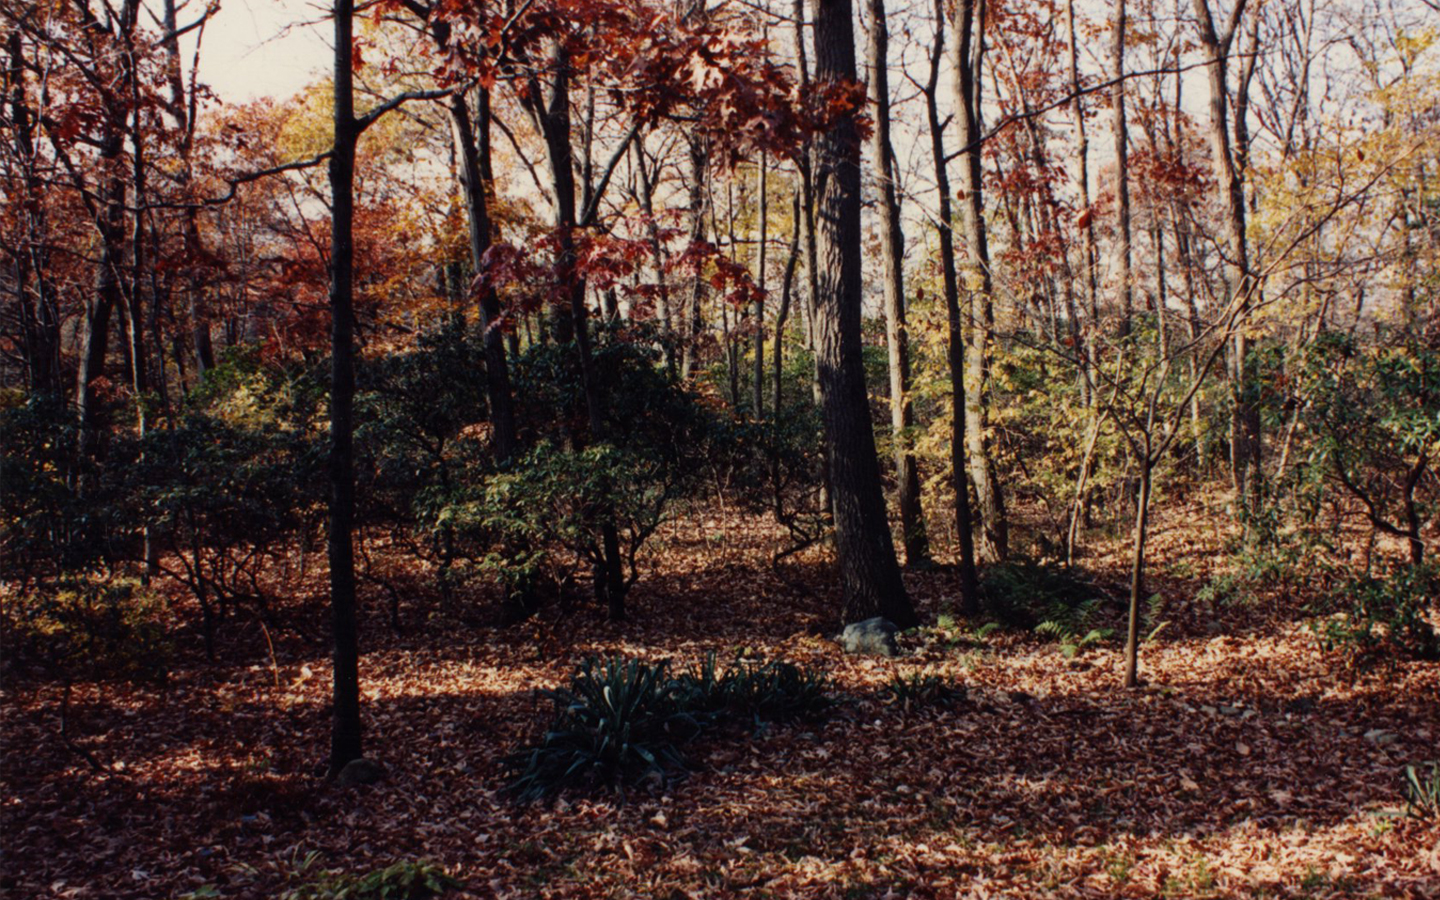
The autumn woodland minus the weeds, vines, invasives and cracked branches.
The area I was considering was unconstructed. An untouched mix of woodland weeds with prickles and thorns. Vines that entangled my ankles attempting to bring me to my knees. Invasives on the New York State list of plants to avoid was like a who’s who of what I had in my garden. What problems weren’t on the ground were overhead. Cracked & broken tree branches to duck under and avoid in the wind lest they clobber me on their hasty descent. Generally speaking a dense unloved mess.
But I persevered. I am not just a gardener but I am also an artist who sees things that others don’t. I was determined to rescue this plot of land. To provide it with dignity.
Over time and with changes of season I took to walking around and through the woods, enjoying the shade, and the various greens and textures that a woodland presents. The sights are more subtle in the woods. No sunshine that makes you squint to limit your vision. No brilliant expanses of color to draw your eye.
You notice instead the hint of a breeze dancing through the nodding leaves. A patch of mild transient sunshine peering through the dappled shade. I began to hear what the woods were saying to me. To feel what it was saying. I learned what to treasure, what was real and meant to be, and what didn’t belong.
A gardener, decades before me, carefully planted hemlocks surrounding the outer fringes of the property. These were now stately trees forty or so feet tall. These added an aged presence to the scene and provided a strong sense of enclosure.
In researching what was native to the area I found that the Mountain Laurels which grew throughout the garden were here before any of our houses appeared. I focused on preserving them. These native Kalmia latifolia were under stress due to the many years of drought they were experiencing. I was determined to honor them and work toward their preservation.
My strolls through these thickets helped me pinpoint the laurels and I began walking around them to see the best way to showcase them. I decided that they would be the center of individual beds and that I could connect various beds with paths and allow me to admire these architecturally diverse shrubs from all angles.
Growing in the woods surrounding and into the Laurels was a mix of ivy and poison ivy. These had to go. Over time I began to remove the ivy but most of the poison ivy removal I left to the pros. It was a few years before that initial episode was mostly behind me but to state a fact, it is due diligence that keeps these plants from overtaking the woods yet again.
As the paths began to appear I decided that the springy feel of the natural woodland ground brought a comforting physical experience right up through the soles of my shoes into my body. I was determined to use wood chips to maintain that back-to-nature harmonious and quiet experience. I continue this even now. About every 5 years the wood chips have converted to compost and are scooped into the garden beds. New wood chips are delivered in huge piles and the process begins again.
Delineating the paths I had a simple solution. With each shovel I put in the ground I removed yet another river rock. The street along one side of my garden is named Stony Hollow Road for a reason and to this day, over 30 years later, I am still removing rocks from their hiding places under the ground.
Another decision I made was to avoid dead ends. Life isn’t about dead ends, it is about transitions and journeys. Each path I created offers a choice of direction. I call it the road less traveled concept. This enabled me to have a different stroll each time I walked around the garden. New sights to see, new thoughts to contemplate, new experiences with each journey.
These woodland paths have gifted me with decades of intimate and satisfying connections with nature. The feel of the ground beneath my feet. The changing light of the day. The turning of the seasons. The gifts of growth and the sadness of loss as the garden goes through its life cycles. I too share these cycles. As do we all.


Overwintering My Summer Tropical Garden
I garden all year round. Three-quarters of the year I garden outside but for a few months in the winter, from late fall to early spring, I garden indoors.
In what used to be my darkroom, I now have LED grow lights so I can overwinter my tropicals & grow cuttings from my summer garden. I use timers to turn the lights on and off to match the daylight hours outdoors since some plants are daylight and some are temperature driven.
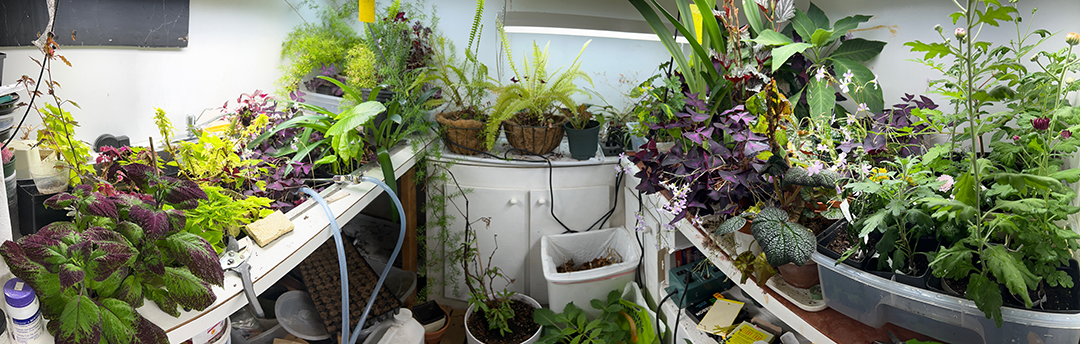
March 8, 2023 My former darkroom which now is my plant room with LED lighting on timers for overwintering my tropicals.
It was an easy retooling of the darkroom since I already had a sink and water in the room with counter space and cabinets. The room isn’t heated so I believe it was originally a root cellar when the house was built in 1942. That it doesn’t freeze and stays cool allows for a reduction in disease & pests when the room is too warm. The year that I changed from fluorescent lighting to LED’s was transformational in that the room stayed cooler which reduced the incidence of scale, mites, aphids and fungus.
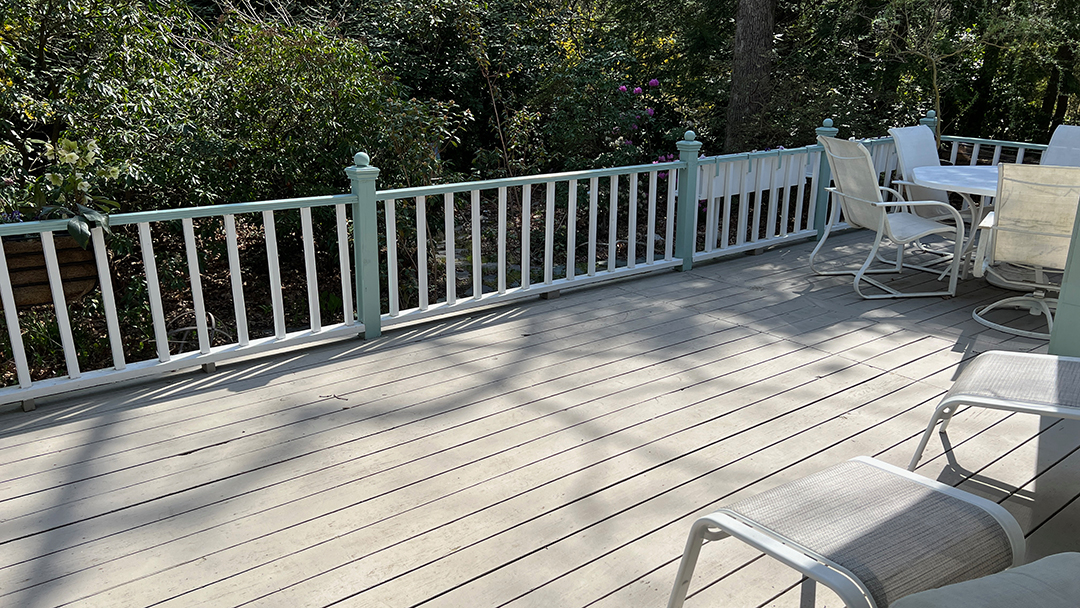
April 13, 2023 The deck area awaiting its transformation.
Beginning in March I pot up all my elephant ears to give them a head start for outdoor planting once the weather reaches 50 degrees. Slowly I bring some of the pots out of the plant room to help them adjust to natural lighting.
By April I have brought all my large containers out of the garage and refreshed the soil to make them ready for planting. In May, depending on the plant, I begin to fill the deck containers with the overwintered plants, grooming them where necessary. There is not much all-day direct sun in that area of the deck but as a precaution, I do not put the newly planted contributions into the sun immediately, instead, I gradually introduce them to the new lighting.
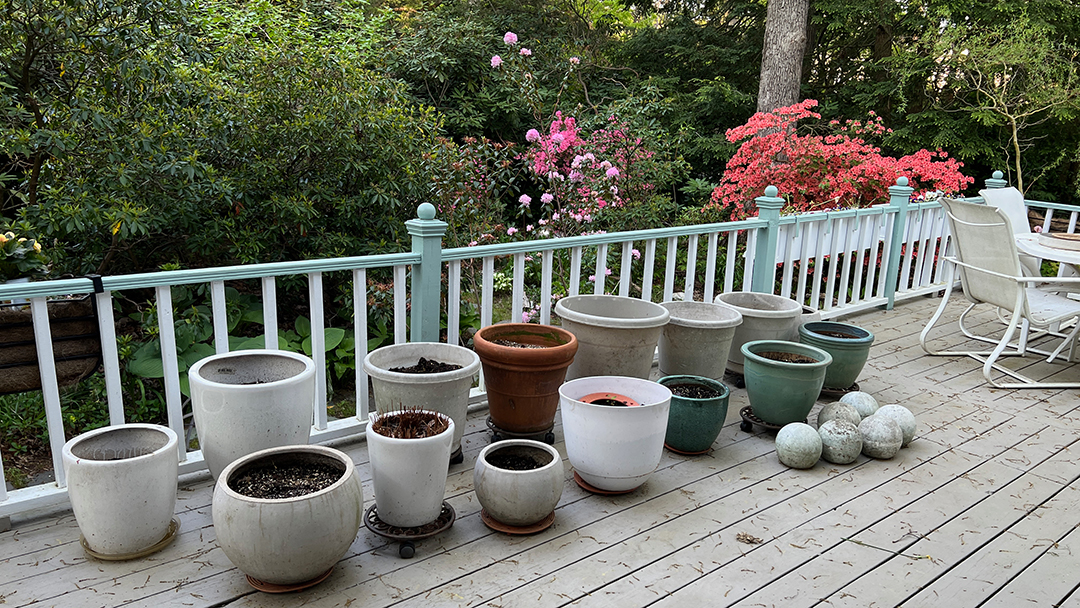
Mary 8, 2023 Some of the containers that are stored in the garage over the winter.
All my largest containers are on wheeled bases so I can easily redesign the display as the season progresses. The growth of the grouping is astonishing as the season progresses which I often don’t realize except when I review my garden photos looking for inspiration for my studio.
Sitting outside looking at this summer display while having my afternoon coffee break gives me time to think about how lucky I am to be in my garden all year round. Whether in the summer knee deep in flowers, in my winter plant room inhaling the smell of the soil and plantings, or in my studio painting the inspiration these flowers share with me.
June 6, 2023 The early summer scene of the tropicals ready for their summer vacation.
My iPhone Plant Identifier is Very Cool
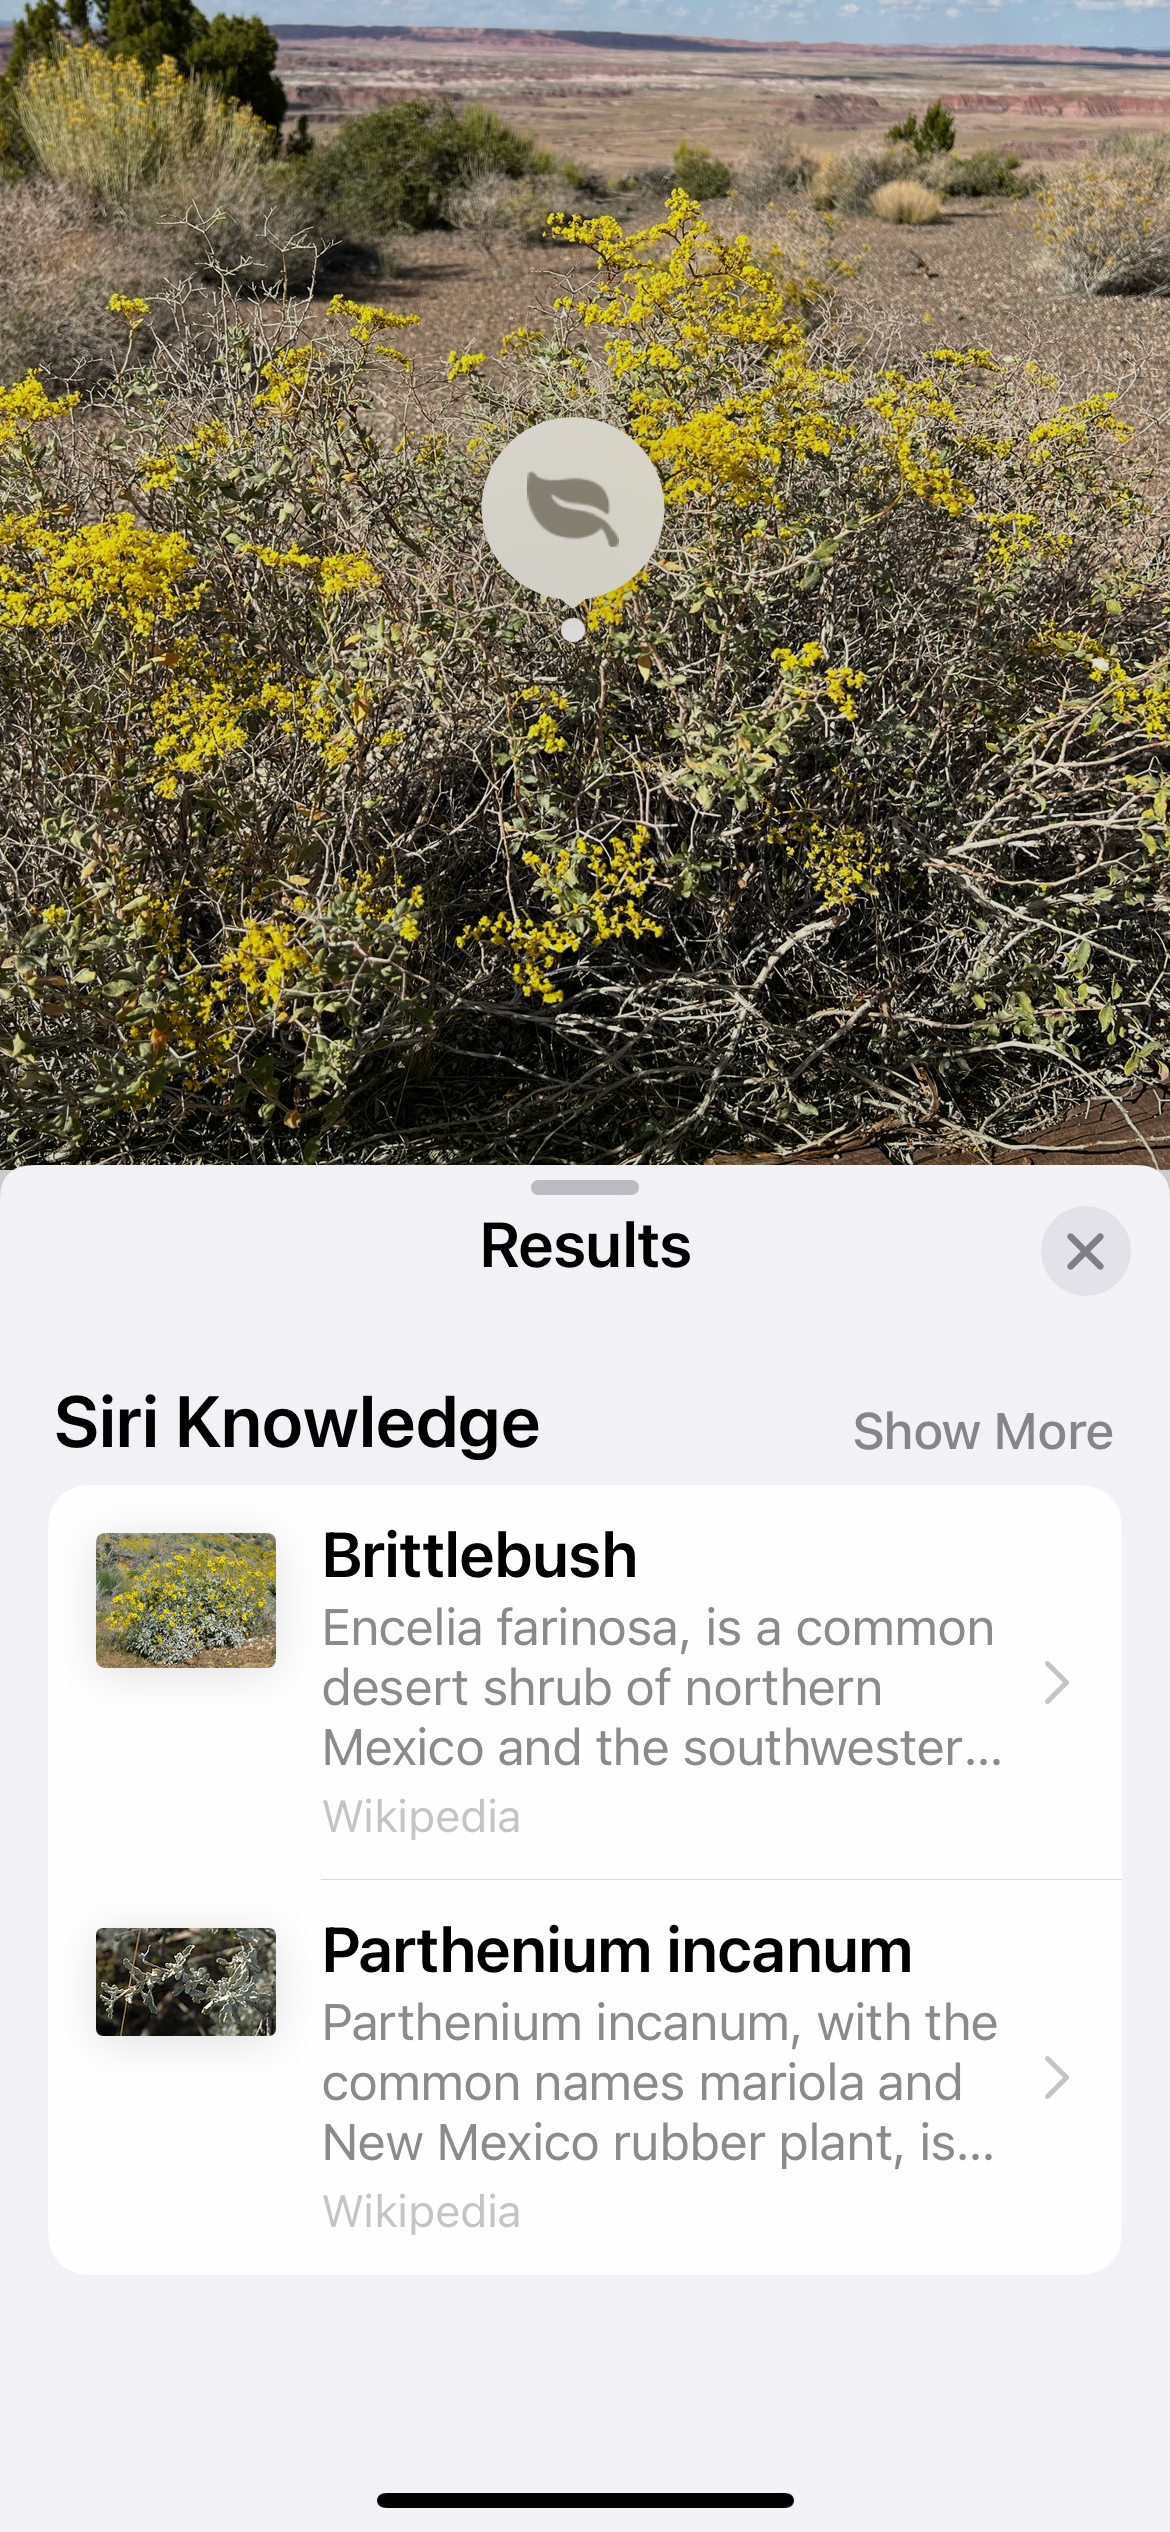
Screenshot of the plant ID feature on my new iPhone 13
My new iPhone 13 has a great feature for identifying plants. Just take a photo of the plant, hit all the right buttons and voila, it gives you the suggested name or names of the plant. It also gives a few links to try to further learn about and identify the plant as well as suggestions for other plants similar to it for further research.
Sharing My Garden In Support of the Huntington Historical Society
June 6th is one of the many days I think of my Uncle Teddy, the man who introduced me to gardening at the tender age of 6. Because of him, I began my long journey into gardening. I’ve written about him in previous posts.
This year on June 6th, I opened my garden to benefit the Huntington Historical Society. It was so fitting that it fell on Uncle Teddy’s birthday since, in the garden, he and I are entwined together. For five hours straight I taught, explained, identified plants, offered historical references, shared my knowledge, and thoroughly enjoyed myself. Between 200-250 people came to enjoy my creation.
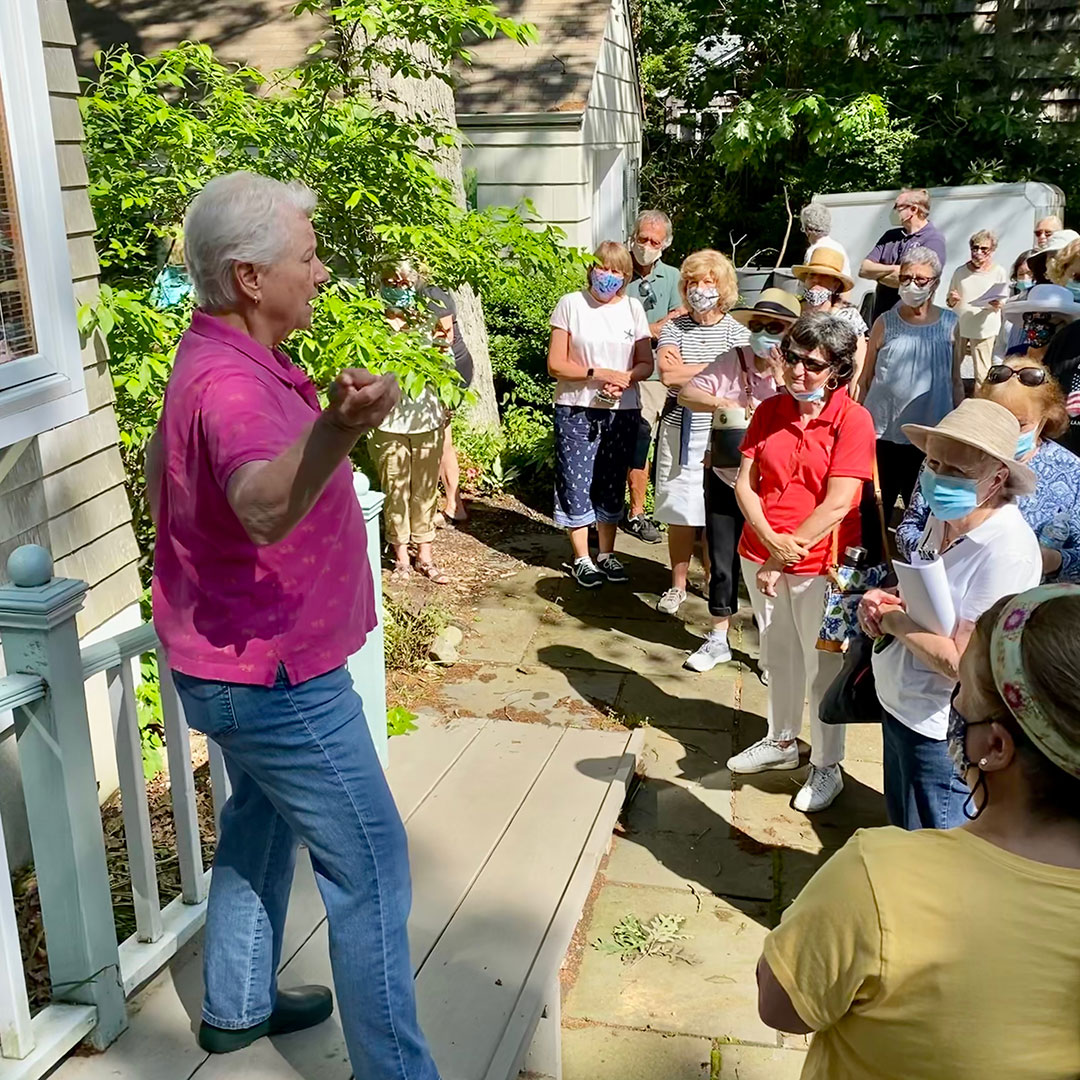
June 6, 2021, Huntington Historical Society Garden Tour – Welcoming the Docents
Lessons From The Garden
I am a gardener. So in 1989 I bought the garden with the home I could afford in the zip code I sought to live in. It’s the first house as you enter my town but some have needled me and said it was the last. I know better.
That gray day in February, the realtor brought me to five different properties. It was the first day I was actually house hunting but when we pulled into this particular gravel driveway I knew I was home. The house didn’t really interest me all that much because I knew the garden had good bones. The giant oaks and the abundance of understory shrubs of mountain laurel spoke to me. I particularly envisioned how beautiful the spring would be when all those dogwoods came into bloom.
I was home and I knew it. So I made an offer below the asking price. As a single parent of two teenage sons, I reserved enough cash to modify the living space so they could have a room of their own. The offer was too quickly accepted which dismayed me since that meant I could have bid even lower. But, oh well, what’s done is done. I had the garden I dreamed of.
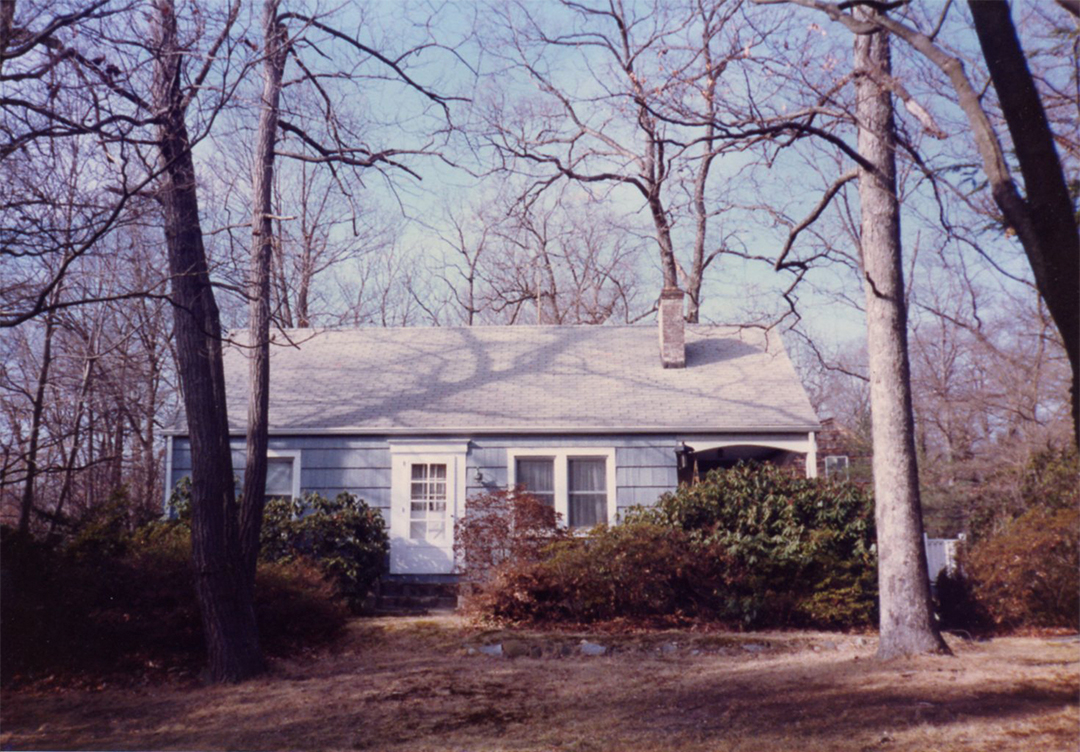
Two-Bedroom Cape Purchased in February 1989
That winter I would walk in the garden pulling dead leaves from the shrubs, picking up twigs, learning, and looking. Eagerly I awaited the new growth of spring the flowering of the dogwoods. Fingers crossed there might also be some perennials bursting with color in the beds. Continue reading →
Shown Up By An Ant
I had to take a break from the hours I had just spent weeding in the garden in the heat of the summer. I was bone-weary. Thirsty enough to pour a gallon of water down my throat. My back ached from all the hours of bending and lifting. I was dirty. Actually I was muddy with sweat.
I sat back, sinking into the cushioned deck chair in the shade, my fingers wrapped around a huge glass of iced coffee. As the dizziness started to subside, I looked down towards my feet stuck into filthy work boots and next to them I spotted a carpenter ant. Now, as you know, carpenter ants are the big ones. But size is relative. Compared to me it was really, really small. This tiny creature was carrying on its back what looked like a giant white breadcrumb that was twice the size of her own body.
 This little ant had a destination in mind and was determined to get it there. Well, as I sipped my iced coffee and began to cool down I watched this creature travel across the deck, board by board. It managed to carry this load on its back over every crevasse and never drop it. Occasionally she met with another carpenter ant but after acknowledging each other they each went their own way. My ant never shared its load with others to make the job easier.
Bringing The Garden Indoors
Every year I’m faced with decisions about where to spend my energy. Each year that decision shifts as my available time, available focus, and available interest fluctuates. Those issues don’t present themselves in linear time. There is no steady march towards some undetermined goal. No inevitable trudge towards downsizing.
Now I’m facing another decision point, one that I face each fall. I ask myself if it’s worth it to continue my seasonal shifts of bringing the garden indoors and outdoors again next spring. Do I let nature make the decision and just buy all new plants when the season begins again? And if I do decide to harvest, what will I bring in, where will I put it, is it worth the effort this particular plant will present me with, and what is the value of each choice given my limited space?
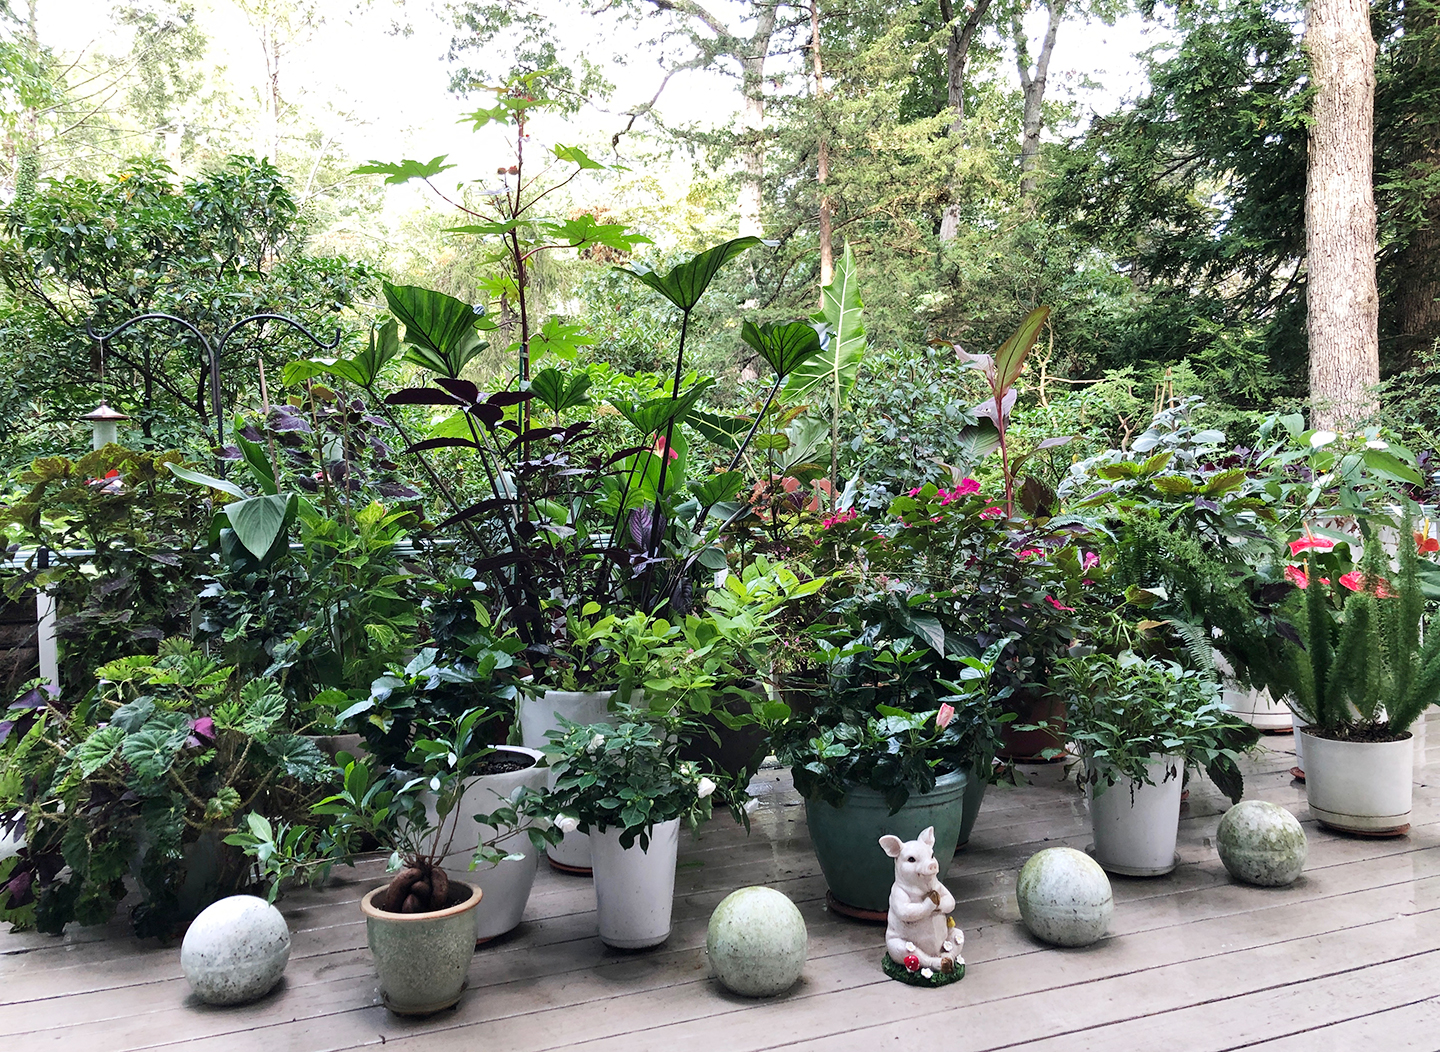
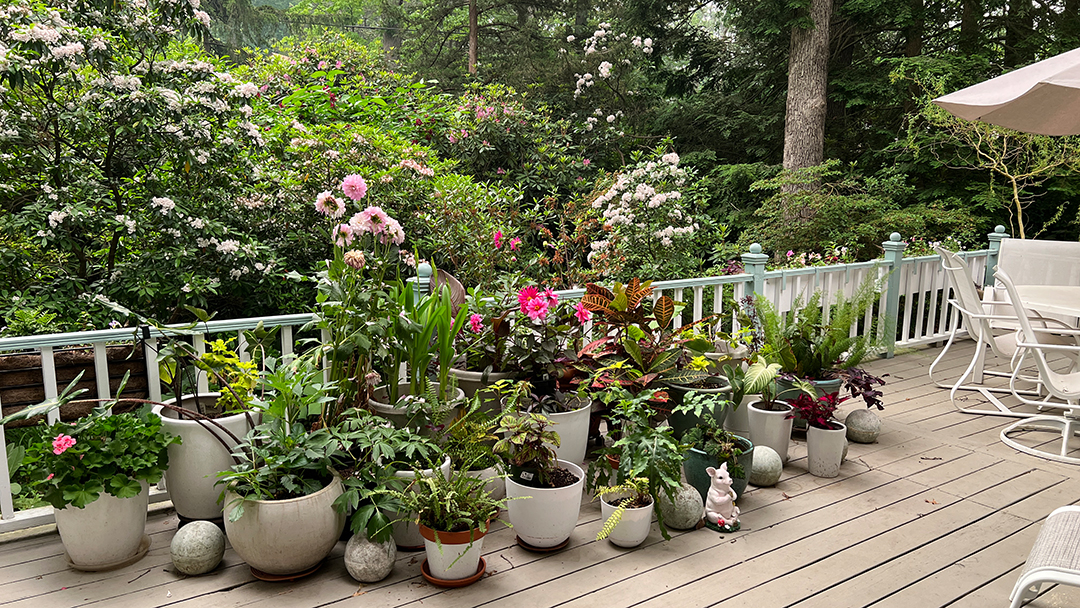
These are some of the deck plants. There are also 8 window boxes on the railings, 3 large box planters & other assorted containers around the corner from these. What was I thinking!
Living With Scars
In my garden I have hundreds of shrubs and trees. I’ve designed woodland walks that encourage immersion in the garden as you journey along the different paths. Each time I walk the garden I meander a different trail to observe the small and big changes that occurred since my last visit. Sometimes it’s a new tiny shoot emerging from the soil just seeing daylight. Sometimes there is a plant weakening and a slipping into senescence. But each time the garden tells me its stories.
Twenty years ago when I was designing this garden I hired a company to help carve the terrain. Soil was to be dumped behind the row of trees along the edge of the property to make a berm, thus creating a buffer to the street and more privacy in the woods. The driver of the bobcat had the sensibility of a construction worker rather than a gardener. There was a carelessness to his treatment of the trees. He didn’t respect their majesty. At one point he drove his bobcat forcefully into the trunk of one of these, he didn’t blink, he didn’t stop, he just backed up and kept going, Concerned only with his job at hand.
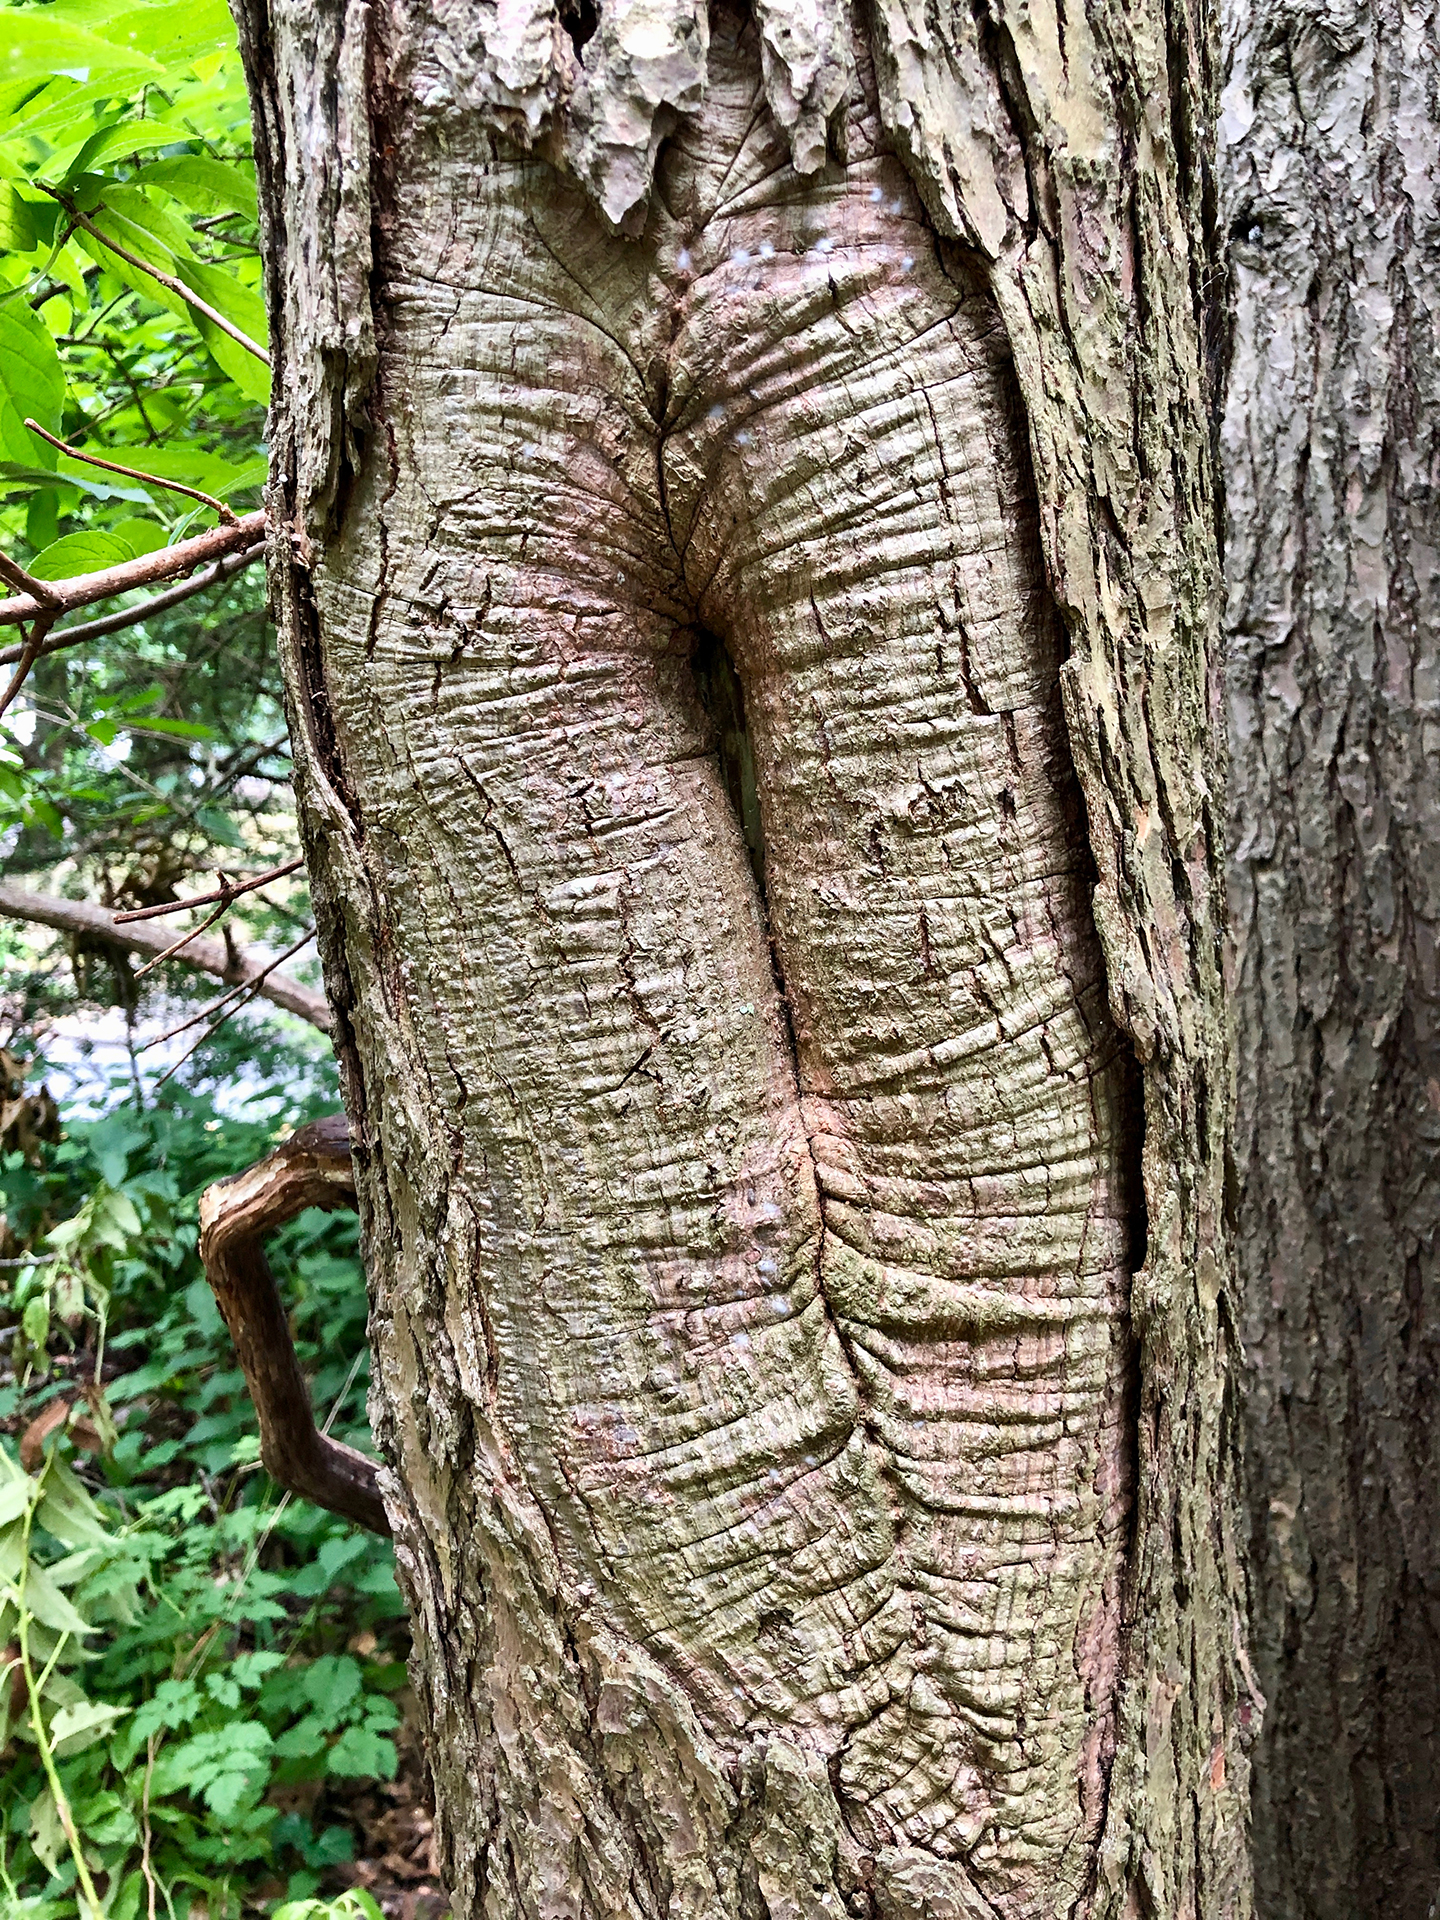
This hemlock trunk has been healing for over 20 years now.
I walked to the tree truck and gently covered the gouged bark with the palm of my hand. I spoke to it as I often do while amongst the plants. Over the roar of the machine, I softly apologized and told the tree I was so sorry. I felt its hurt personally. It felt natural to me to nurture that injury as I’d cared for the scrapes and cuts on the bodies of my young sons.
Caterpillars Ate My Dreams
At the end of the darkness of winter, I start from infinitesimal seeds the hopes and dreams of a new season. Spring is about optimism, plans and possibilities for a future of glorious beauty meant to nourish our hearts and our bodies.
Dreaming of meals, the simmering soups bubbling on the stove, the roasts in the oven. I am transported by the seasonings growing in my herb garden, warmed by the sun. These meals will nourish those who gather together.
My Wizard of Oz Moment
I grew up in Brooklyn in an area defined by the brick of the houses and the gray concrete of the ground. The concrete sidewalks had slightly different textures depending on the amount of pebbles that were in the mix. Some of the concrete blocks were broken. I avoided walking on those since kids in my class had told me that if you step on a crack you’d break your mother’s back. That thought scared me.
There were a lot of fences I could run my hand along each day as I walked the 5 blocks to elementary school. The fences were mostly made of metal. Some had diamond-shaped patterns with sharp twisted points all along the top. Others were evenly spaced black metal spikes that were like the ones I saw in the killing traps in the Tarzan movies.
My favorite summer vacation getaway was to stay with my Uncle Teddy who lived in the country. The 4-hour drive to Schenectady always filled me with happiness in anticipation of seeing him again. Seeing his smile. Getting his hugs That excitement almost made my miserable car sickness worth it.
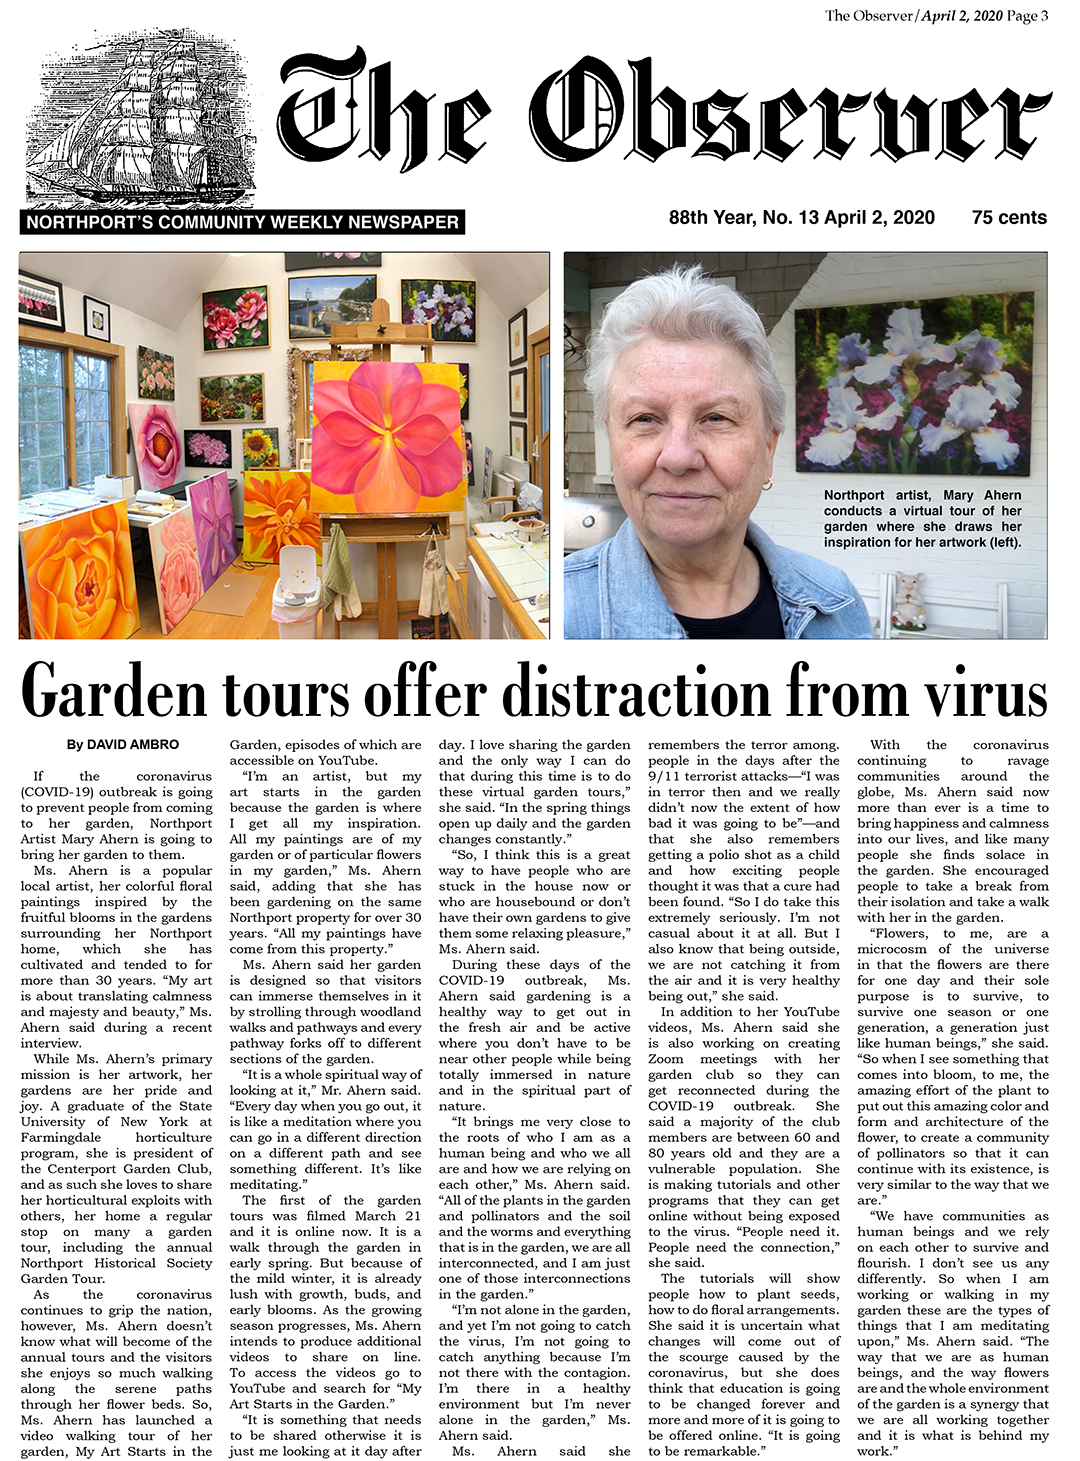
Garden Tours Offer Distraction From Virus – The Observer by David Ambro
I was delighted to open my local paper, The Observer, and right there on Page 3 upper right was a big and generous article about my Virtual Garden Tour Video. David Ambro the Publisher, outdid himself by putting into words the far-flung conversation we had of how people are coping with the Covid-19 pandemic. As an artist and a gardener, it was a natural for me to share my garden online since the many garden tours I’ve hosted over the years were not going to happen anytime soon. My garden provides the inspiration for my art but it also gives me emotional solace. This is what I love to share with my visitors.
I thank David so much for sharing my thoughts and my garden with a wider audience.
To see my YouTube Channel with my videos you can click here.
Now here’s the article David Ambro wrote.
 Click on this link if you would like to download a pdf of this article.
My Garden Tour Video March 21, 2020
My Art Starts in the Garden
I love to share my garden! This is a creation that I’ve been working on for over 30 years and what fun is it keeping it all to myself? That feels so selfish to me.
So the best thing I can do, since it’s hard for so many of you to travel here, is to take you on a garden tour around my 1/2 acre woodland walks in Northport NY. We’re Zone 7 here and this Garden Tour video is in the early spring on March 21, 2020 around 6pm in the evening.
I haven’t yet finished my fall cleanup at this point and of course, as gardeners well know, the garden is never perfect. At this time of year, in my neck of the woods, something new opens every single day. It’s a very exciting time for me each day as I walk around to see what’s new. Spring is about renewal. About optimism. About color. About surprises.
This is the first in a series of Garden Tour videos I’ll be doing so please remember to subscribe to my YouTube Channel to be alerted when I publish new videos.
My garden is the source material for almost all of my paintings. It is where I get my inspiration. It’s where I present yet another aspect of my creativity but this one is in 3D and seasonally adjusted over time and temperature.
Come and take a casual walk with me around my garden. Enjoy!
How Water Travels Through a Plant
When we need to “Water” ourselves we take a drink towards the top of our stem, our mouth.
This water, sooner or later is then is eliminated, as if by gravity below the point of entry.
Plants, on the other hand, take a drink at the very bottom of their structure, their roots, and then, defying gravity, eliminate the excess at the very top of their structure, their leaves.
How is this journey accomplished?
Pathway of Water Through a Plant
- Water enters the plant through the root hairs.
- It is then conducted upward in the stem via the xylem.
- Water exits the plant through the stomata located on the leaves.
Osmosis is the process used for the water to enter the root hairs.
Cohesion-tension theory is believed to be the method that water is conducted upward via the xylem. Think of adjacent drops of water, which when their exterior barriers are broken, move & merge into one larger drop.
Transpiration is the process of water evaporating from the leaf.
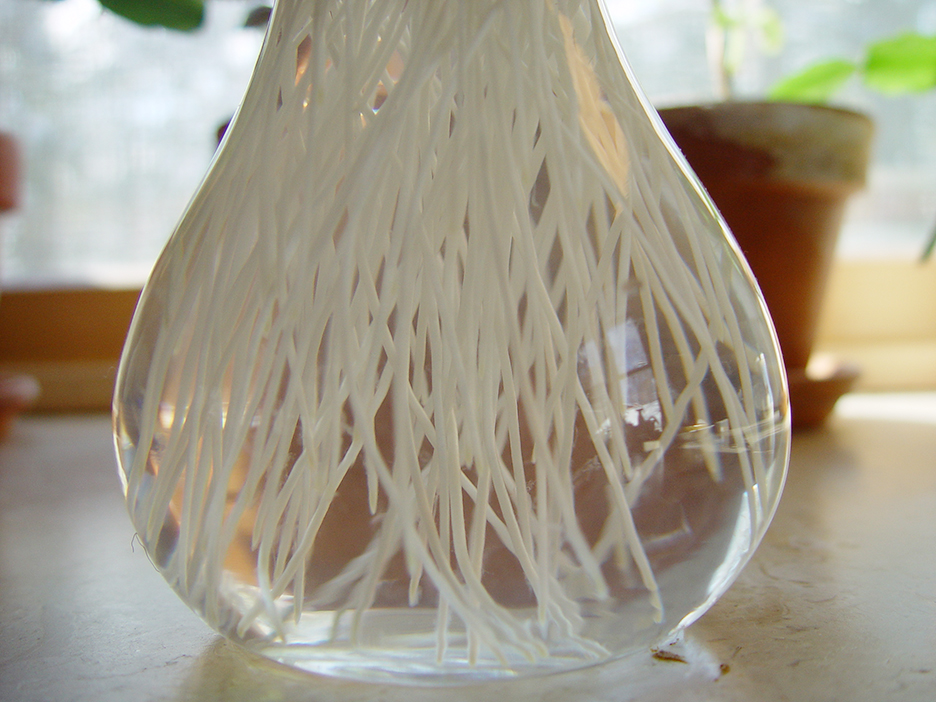
Roots have microscopic root hairs to take up more water
Growing New Gardeners
How do we grow gardeners? We start them young. We intrigue them with our questions about what they’re seeing, what they’re hearing. We let their imaginations run rampant. We celebrate their dirty hands and knees and when they grow up they already love their favorite garden spots.
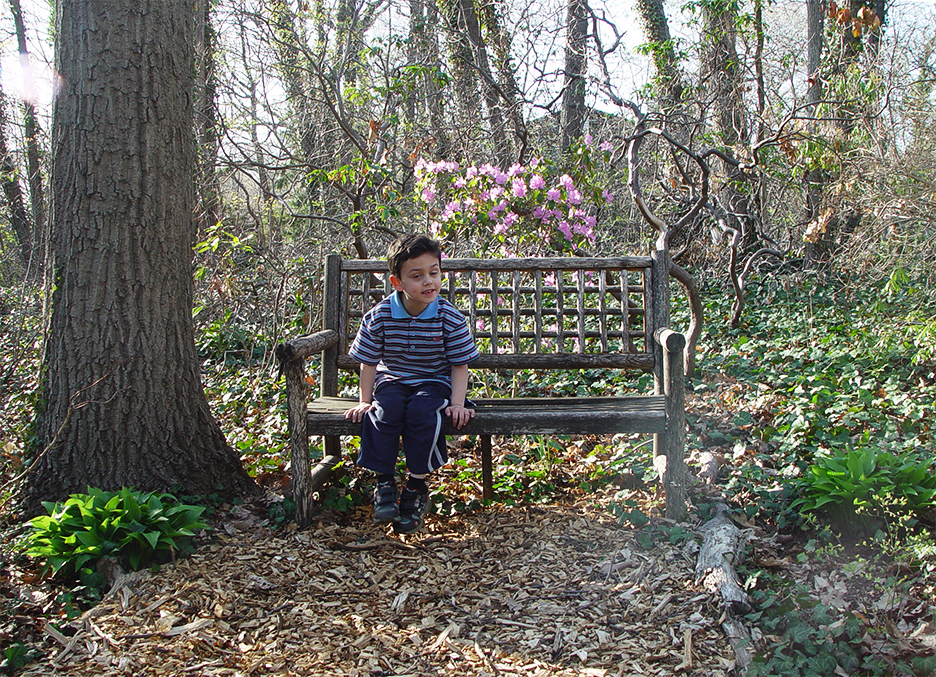
My grandson CJ taking a break from chasing dinosaurs in our woodland garden on April 26, 2006.
We pass on what our elders taught us that captured our fascination with the world around us. How did we come to appreciate the complexity of leaf edges and the critters crawling under our stumps and stones? We talked with them, we enjoyed the experience of learning and sharing. We made the garden the center of their invented stories, their imagined dinosaurs, the strolling around the paths that led to nowhere but really everywhere.
My Uncle Teddy passed down to me the mysterious and exciting world of nature and the gift he gave me keeps giving. As my grandson CJ completes his Eagle Scout project of creating a woodland path through a nature preserve dedicated to native plant species with the eradication invasive species, we see how we generationally share our knowledge and continue to contemplate our universe.
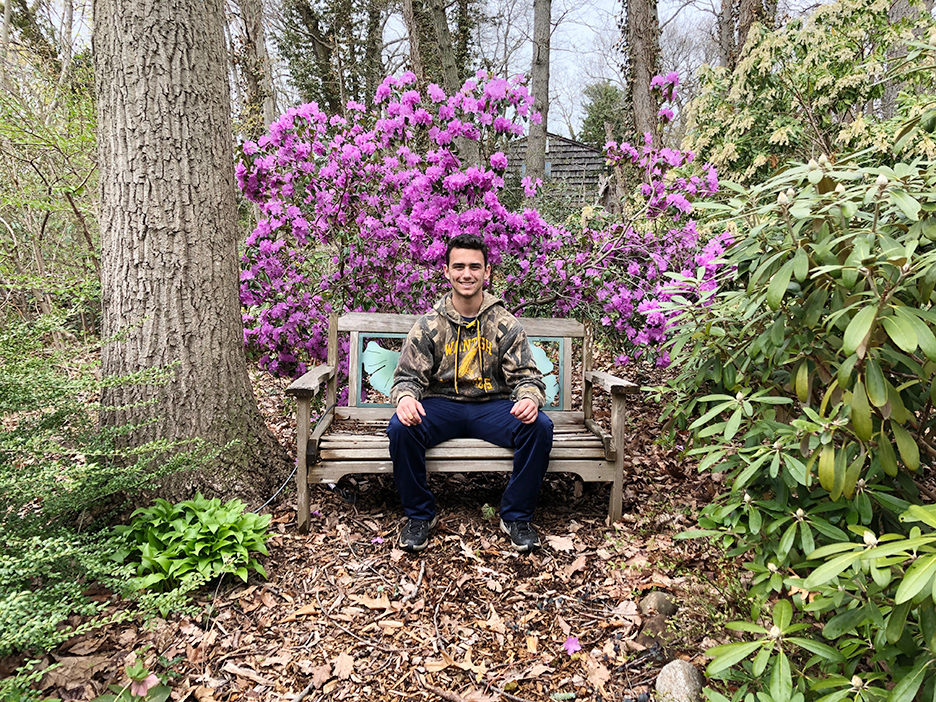
My grandson CJ Ahern sitting at one of his favorite spots in our woodland garden on April 29, 2018 just before he started his Eagle project to restore a neglected woodland area at an animal sanctuary in Seaford NY.